
Radon is a naturally occurring radioactive gas that can cause lung cancer in higher concentrations in any indoor environment. If you want to install a radon mitigation system but have no idea how to do it, you need not worry! We have researched and will guide you on installing the Everbilt Radon Mitigation Basin Cover.
To install the Everbilt Radon Mitigation Basin Cover properly, follow the step-by-step procedure listed below:
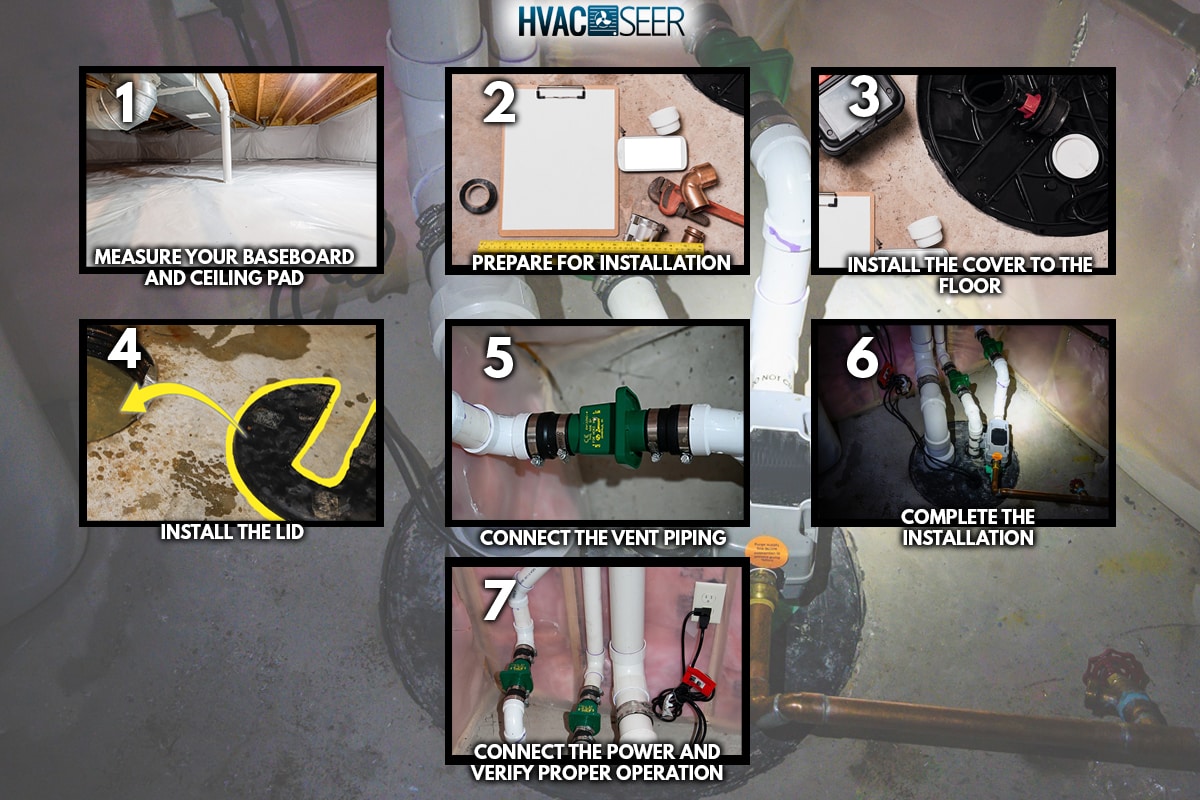
- Measure your baseboard and ceiling pad
- Prepare for installation
- Install the cover to the floor
- Install the lid
- Connect the vent piping
- Complete the installation
- Connect the power and verify proper operation
However, installing Everbilt Radon Mitigation Basin Cover can be tricky because several materials and tools are involved in executing the job. Read further as we explain each step in-depth so you can understand and follow through quickly.
How Is An Everbilt Radon Mitigation Basin Cover Installed?
Radon naturally occurs in the soil and can pass through beneath your home through the gaps in your house's foundation. It also includes the opening due to your sump pump. Therefore, integrating a radon mitigation system with your sump pump is a good idea.
This system siphons the radon gas through the pipes and out of your house. One such system is the Everbilt Radon Mitigation Basin Cover. Everbilt is a trademark brand of HomeDepot in designing and manufacturing innovative products for the construction industry.
One of their well-received product is the Everbilt Radon Mitigation Basin Cover. The product has been developed with an innovative cover system that allows homeowners and contractors to easily install the covers without visiting a hardware store.

What Is Everbilt Radon Mitigation Basin Cover Made Of?
The Everbilt Radon Mitigation Basin Cover is made from strong plastic and has holes that allow water to flow through. The interior surfaces have notches that align with the lips on standard cover bolts, so you attach your basin cover just like any other.
It is also flexible and comes with a full range of flanges that fit every pipe size. The basin has a variety of places for different connections. With its clear-view, detachable inspection plate, the removable cover makes it simple to access the pump.
Application Of Everbilt Radon Mitigation Basin Cover
The Everbilt Radon Mitigation Basin Cover meets two critical needs. It's a universal gas-tight cover that serves the radon mitigation market as a retrofit failing sump and sewage basin cover.
Homeowners can install the Everbilt Radon Mitigation Basin Cover over an existing basin. It provides a new heavy-duty cover to contain and vent radon gas and odors properly. There's no reason to dig up your basement or garage floor to get rid of an old sump or sewage basin.
Remove the old cover and replace it with the Everbilt Radon Mitigation Basin Cover to create a new, sealed system. Install the cover seals off areas where radon gathers, keeping the gas from entering your living space.
Everbilt Radon Mitigation Basin Cover Components
You should be familiar with the parts that the Everbilt Radon Mitigation Basin Cover consists of before installation:
- Cover riser
- Nylon enclosed nut
- Drain plug
- Lid
- Clean inspection plate
- Inspection plate seal
- Plastic vent threaded flange
- Discharge and vent O-ring
- One-hole cord grommet
- Reducer plate
- Discharge O-ring
- Plastic discharge flange
- Stainless steel hex head screw
- Flat washer
- Cover seal
- Rubber hub
- Drill locator

Tools And Materials Needed For Installation Of Everbilt
Before installing your Everbilt Radon Mitigation Basin Cover, you'll want everything you need. Here are a few things you need to help make the installation process go smoother:
- Safety goggles
- Tape measure
- Pencil
- Silicone caulk and caulk gun

Check out this caulk gun on Amazon.
- Hand hacksaw or PVC cutter
- Drill
- 5/16 inch socket wrench (for concrete screws)
- 7/16 inch socket wrench (for cover bolts)
- 3/16 inch masonry drill bit
- 1/4 x 1-1/4 inch concrete screws
- PVC primer
- PVC cement

Here's PVC cement and primer on Amazon.
- PVC pipe
- PVC fittings
How To Install Everbilt Radon Mitigation Basin Cover
Once you have all materials ready, you can install an Everbilt Radon Mitigation Basin Cover. Follow the steps outlined below, and you'll be done before you know it!
1. Measure Your Baseboard And Ceiling Pad
Before installing a radon mitigation basin cover, measure the dimensions of your basement base and ceiling using a tape measure. It's to determine the size of the basin cover and the type of basin cover bolts you'll need to purchase.
Ensure you measure the width and length of your basement base, and the ceiling height above the basement. It helps to ensure you have enough room on both sides and the top of your basement base to install the cover.
2. Prepare For Installation
Disconnect the plumbing and electrical connections of the sump. Allow them to be reconnected once the new cover and lid are put in place. Ensure the floor and surface around the installation are smooth and clean. Fill in any cracks or holes present.
3. Install The Cover To The Floor
On the floor, position the lid and cover the riser as needed. You should ensure the lid's discharge opening is aligned with the sump discharge pipe. Align the lid's bolts with the threaded nuts of the cover (preassembled).
Mark the holes on your baseboard using a pencil so you'll know where to drill them. Use the holes in the cover to mark the locations of the concrete screws, then set the cover and lid aside.
Drill holes at the specified locations using a 3/16-inch masonry drill bit. Use quarter-by-one and quarter-inch concrete screws to anchor the cover to the floor. Liberally apply silicone caulk to the bottom of the cover's lower flange. Lastly, install the drain plug.
4. Install The Lid
To make the installation Everbilt Radon Mitigation Basin Cover easier, pre-install the lid seal onto the lid bolts. You should tighten the bolts well to ensure a proper fit. Install the lid on the cover after taking off the discharge flange assembly.
Put a bead of silicone caulk to the bottom of the discharge flange assembly. Over the pump discharge pipe, install the discharge flange assembly to seal the base plate to the lid. Apply a torque of 20 pounds to the flange bolts.
5. Connect The Vent Piping
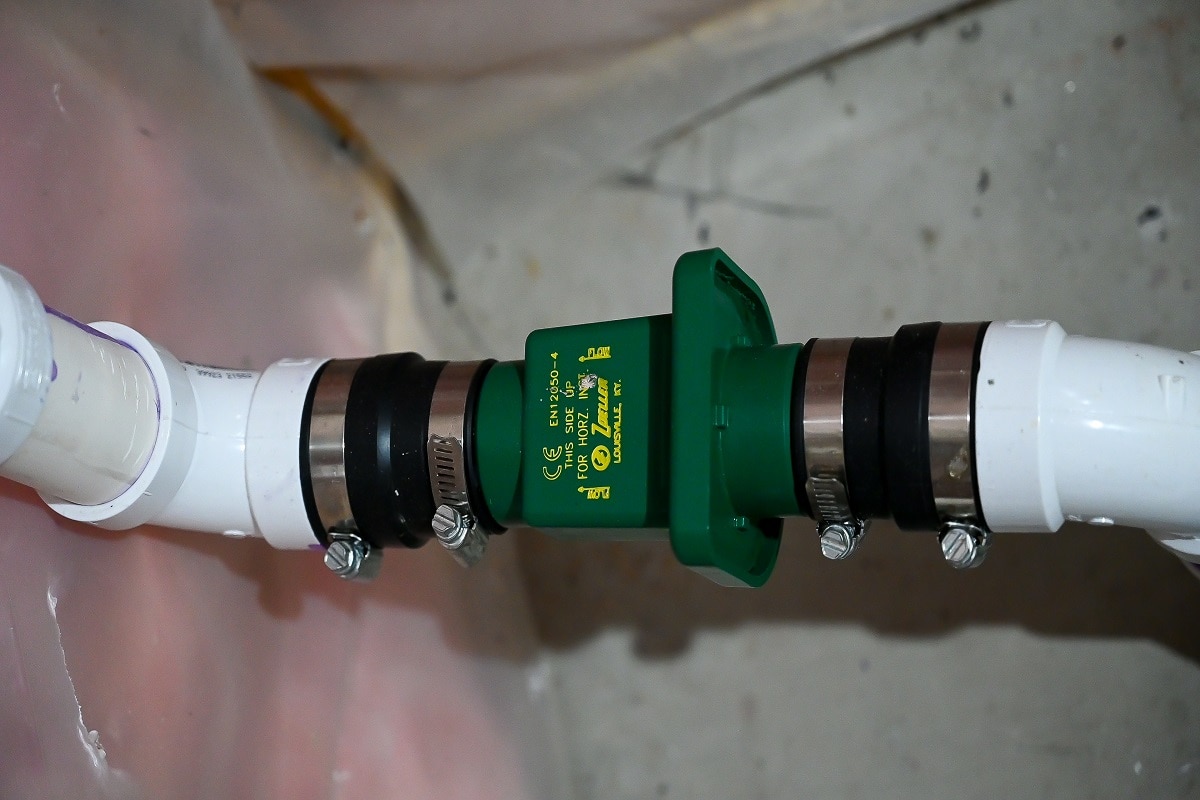
The vent flange should be connected to your vent pipe (not included), and apply a torque of 20 pounds to the flange bolts. Vent the system strictly following local plumbing codes and accepted practices.
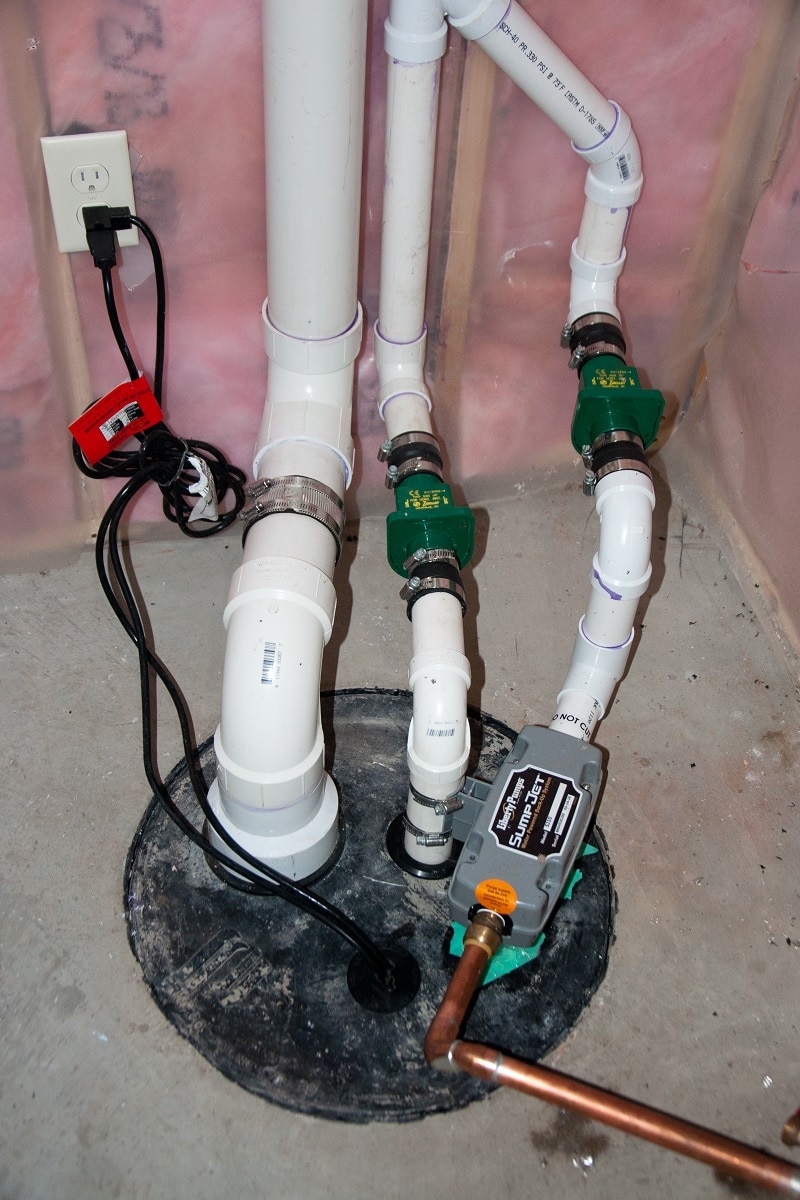
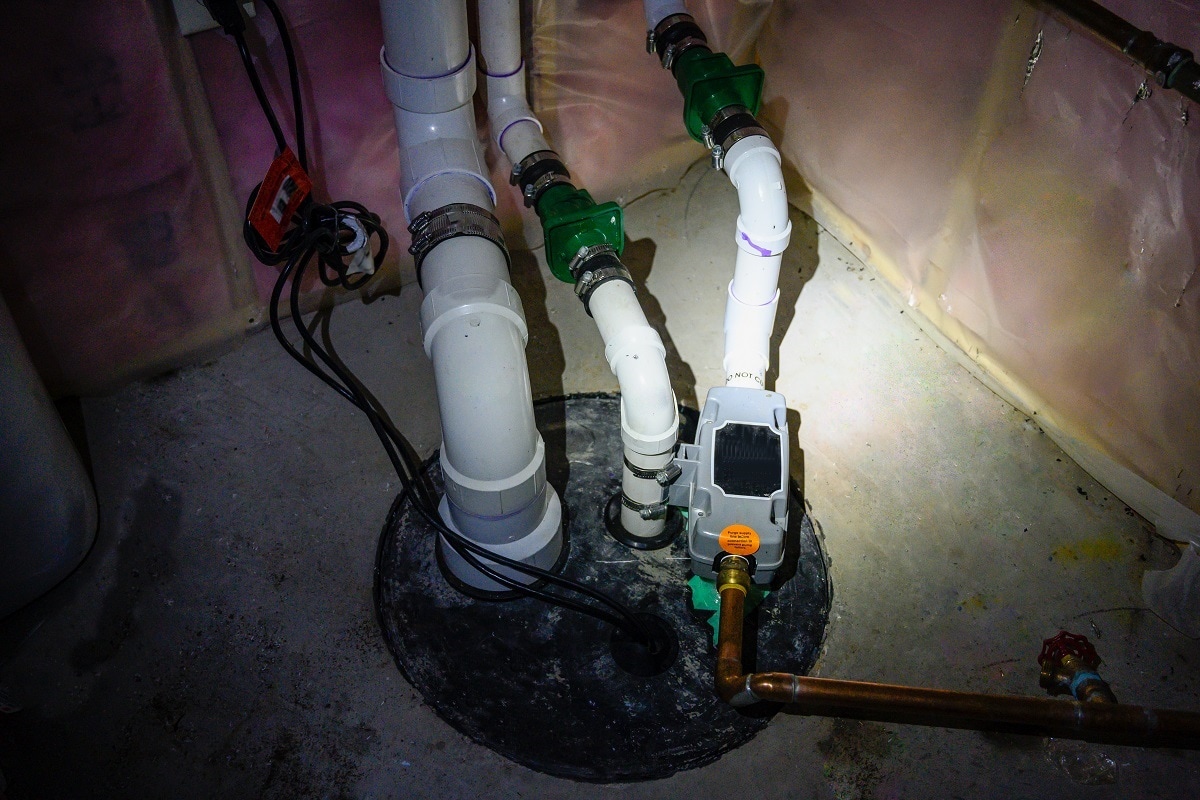
6. Complete The Installation
Alternatively, you can add more openings in the cover to utilize the sealing hubs and bosses provided. For the hub installation, use the hole saw guide and drill finder below:
- Use an E100H hub, and one and three-quarter-inch hole saw for a one-inch pipe.
- For one and a quarter-inch pipe, use an E125H hub, and a 2-inch hole saw.
- Use an E150H hub, and two and a quarter-inch hole saw for the one-and-a-half pipe.
- Use the E200H hub, and two and three-quarter-inch hole saw for a two-inch pipe.

Click here to see this hole saw on Amazon.
The E-series hubs are made of flexible PVC and are quick and easy to install. They are water and vapor-tight seals with no caulking and can fit into 18 to 36-inch basins. For optimal performance, apply a bead of silicone caulk to all cover, flange, and grommet sealing surfaces.
7. Connect The Power And Verify Proper Operation
To ensure a tight water and gas seal, ensure that the cord grommet is inserted correctly into the lid. Finally, you can check the pump by observing its operation through one complete cycle after filling the basin with water.
Wrapping Up
Everbilt Radon Mitigation Basin Cover is necessary for homes with high radon levels. It protects your basement from radon gas. With these steps outlined above, you can easily install one by yourself. If you have any doubts, a professional plumber may advise you.
Have a look at these related articles if you have found this article helpful: