
When summer comes, it's always best to make sure that your air conditioner is in the best operating condition. Goodman air conditioners are some of the most reliable AC units that you can purchase. But how do you clean one? We have researched the steps to clean the unit. In this post, we'll discuss it.
Here are the steps to clean a Goodman central air conditioner:
- Turn off the air conditioner system
- Gather all of your equipment
- Clean the condenser coils and fins
- Clean the blower fan and panel
- Check and clean the condensate drain
- Reassemble the unit and clean the area around it
It doesn't matter if you have a small air conditioner or a larger Goodman unit, the steps for cleaning the units are pretty much the same across the board. Always use caution when cleaning the unit, as damaging any components can result and mechanical failure. Continue reading to learn how to do it.
Steps To Clean A Goodman Central Air Conditioner
In addition to having your annual maintenance checks, it's also helpful to clean your air conditioning unit once or twice a year. Doing so will help ensure its longevity and help you uncover and prevent potential problems before they cause performance issues.
Things you'll need:
- Cleaning cloth
- Drying cloth
- Socket wrench
- Screwdriver
- Water hose
- Condenser cleaner solution
- Condenser cleaning fan brush
- All-purpose cleaner
1. Turn off the air conditioner system
First, turn off the system at the thermostat. Be sure to also turn off the breaker that corresponds to the air conditioning system at your electrical box. To do this, switch the switch down or to the opposite direction if they run horizontally. Switch off the breakers for the central air conditioning unit and then for the condenser placed outside of your home.
2. Gather all of your equipment
Next, gather all of your equipment and cleaning tools and head outside. Make sure that your garden hose will reach the air conditioning unit before and attach a spray nozzle if you have one. This will come in handy when you clean the condenser coils. Next, grab any cleaning solutions, buckets, and a shop vacuum to clean the unit.
3. Clean the condenser coils and fins
Next, spray down the condenser coils and fins with the water hose. Be sure to do it at a distance of about two feet away to avoid damaging the fins. Then take your coil cleaner and spray it all around the fins and coils.
If the unit is really dirty, be sure to let the solution sit on the coils for the recommended time. Then use your water hose to remove the solution and wash away any dirt and debris. Again, be sure not to use too much pressure, as you can easily damage the fins.
Always spray starting at the top and working your way to the bottom of the unit. In the event that the condenser coils are caked with hard-to-remove dirt, you can remove the metal panel surrounding it with a socket wrench. This will give you better access to clean the coils.
If there are any vent fans on the unit, be sure to straighten them with a pair of pliers or a fin tool. And if there is any clogged dirt on them, use your fan brush to gently scrape it away.
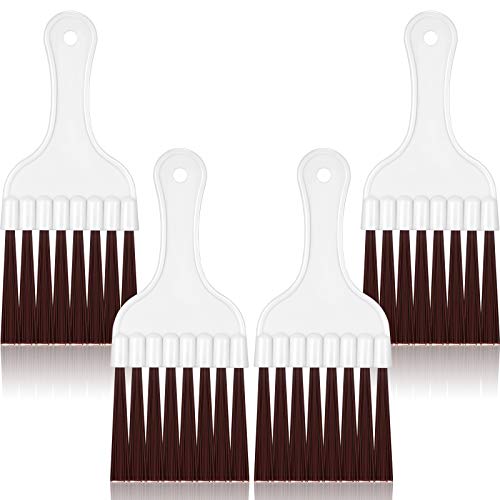
Check out this condenser fan brush set on Amazon.
4. Clean the blower fan and panel
After cleaning the coils and fins, take your socket wrench and unscrew the screws at the unit top panel. This will give you access to the blower fan. After unscrewing the last screw, pull the panel off. Note that the blower fan will be attached to it—meaning that it will be a bit weighty. Set the panel and fan on the ground and spray with your water hose to remove any dirt.
If the blower fan is especially dirty, take a damp cloth and gently wipe the blades. After wiping the blades, be sure to rinse them off with the water hose.
5. Check and clean the condensate drain
Next, take a look at the condenser drain. This is a PVC pipe that is attached to the wall of your home. It's generally located a few feet away from the outside unit. Most condenser lines will have a small T-shaped vent cap or cover. Once you find the access point of the drain, take off the cap to inspect it for blockage.
If it appears to be blocked with debris, flush it with a solution of distilled vinegar and water. And 1/4 cup of vinegar to 2 cups of water and flush it down the end of the pipe where the cap was removed. Let the solution sit for about 20 to 30 minutes and then flush the pipe with the water hose. If the debris remains, repeat the process again.
6. Re-assemble the unit and clean the area around it
Place the top panel containing the fan back on top of the unit and screw it back in place. Take a look at the area around the air conditioner and make sure that it is completely clear of tall grass, leaves, and debris for at least 2-3 feet.
If you have any leaves, branches, or dead wildlife encroaching on the area around the unit, take a weed wacker or a pair of garden shears to trim it back.
How do you clean the inside of a central air conditioner?
Cleaning the inside of a central air conditioner essentially means cleaning the condenser coil, which is actually located on the outside of your home. You can open up the condenser coil using a socket wrench to clean the area housing the blower fan, condenser coils, and some electrical components.
However, you don't need to necessarily take apart the unit to clean it. The most important part to keep clean is the condenser coils and fins, located on the side panels of the unit.
To clean this, you can use a water hose with a spray nozzle attachment and condensing coil cleaner. Simply spray the unit with the cleaner and allow it to sit for the recommended time, and then rinse it off using the water hose. You can also open up the side and top panels and use a wet and dry vac to suck out any dirt, debris, dead leaves, and insects then may have fallen through the top of the unit.
In addition to cleaning the outside unit, you'll also want to replace or clean the air filters for your central air system. These are located on the inside of your home in the vent connected to your furnace.
Lastly, be sure to check and clean the condenser drain line if needed. You can easily clean this by pouring diluted vinegar down the line and then following it up with a rinse it out with clean water.
What is the best cleaner for air conditioner coils?
There are a couple of air conditioner coil cleaners that work wonderfully for cleaning your unit condenser coils and fins. Let's take a look at one that's highly recommended by HVAC pros.
Nu-Calgon Tri-Pow'r HD 4371-88
This condenser cleaner works in a few different ways. Not only can it clean your condenser coils and degrease other dirty components, but it also freshens up the system in your air conditioner as well. This is a non-acidic cleaner that can also be used on motors, fan blades, and any other parts that need to be decreased are cleaned.

Read more about this cleaner on Amazon.
How do I change the filter on my Goodman air conditioner?
Changing the filter on your Goodman air conditioner is typically done by the blower compartment, which is in the furnace. You'll simply need to remove the current filter by lifting it up and out of its space, and then slide in the new one.
How do you take apart a Goodman air conditioner?
You can take apart a Goodman air conditioner using a socket wrench and a screwdriver. You'll need to remove the side and top panels with a socket wrench. Next, you'll need to use both tools to remove the housing for the compressor and the electrical panel.
Want to see how it's done? Check out this video:
Wrapping Things Up
We hope that this post has helped you understand how to clean a Goodman central air conditioner. Remember, the better you maintain your air conditioner system, the longer it is likely to last.
Before you go, be sure to check out some of our other posts: