
Ventilation is a vital component of home roofing that can help reduce energy costs, moderate indoor temperature, and preserve roof and attic integrity. Because it's so important, there are now many different options for ventilating a roof. In this post, we'll walk you through the process of ventilating your roof using a ridge vent.
A ridge vent is an ideal ventilation system for homes in a humid climate. It is also cost-effective. To execute shingle roof ventilation with this type of vent, do the following:
- Prepare the materials
- Measure and cut the vent opening
- Install the ridge vents
- Install the shingles over the vents
Improving air circulation under your roof using ridge vents has a lot of benefits. If you think now is the right time to make your roofing more efficient and functional, consider installing this type of vent. Read on to learn more!
How to Ventilate a Roof With a Ridge Vent
With properly installed ridge vents, you can ensure adequate ventilation for your attic space and roof structure. Many homeowners prefer ridge vents because they are weather tight, have a low-profile design, and are barely noticeable, keeping the roof aesthetically neat.
Here are easy-to-follow steps for ventilating a roof using ridge vents:
Prepare the materials
To ensure the proper and easy installation of ridge vents, you will need the following materials and tools:
- ridge vent (brand of your choice)
- shingle caps
- 2- to 3-inch roofing nails
- hammer
- plywood cutter/cordless circular saw
- shingle cutter/ordinary cutter/utility knife
- chalk line
- tin snips
- pry bar
Measure and cut the vent opening
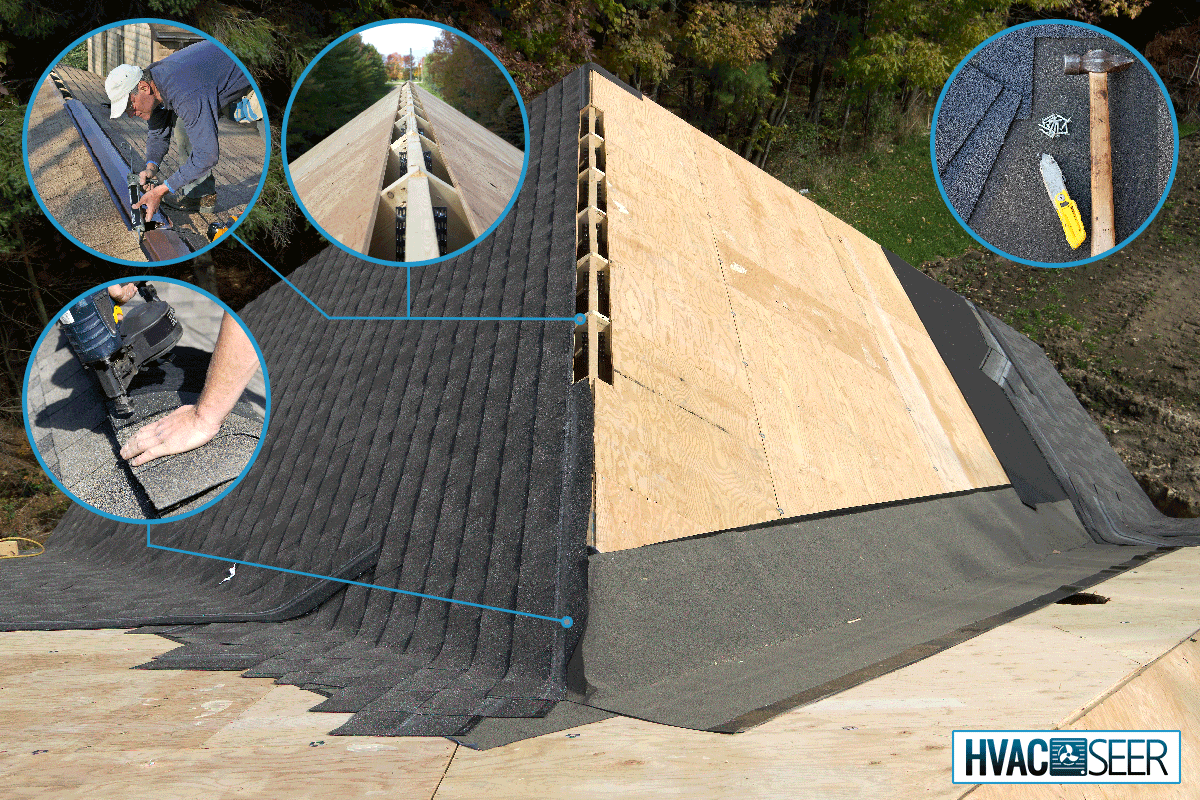
Remove the existing shingle caps at the peak of your roof using a pry bar to expose the underlayment or shingles underneath. Cut out the underlayment or shingles to further uncover the ridge board.
While you have the option to cut the ridge vent across the roof, it is highly recommended to only start cutting near the point where the attic or roof overhang starts. You can use a chalk line as your guide.
Upon exposing the ridge, use a cordless circular saw to make a two-inch opening on it where warm air can pass through. Before cutting through the wood decking, figure out its thickness so you won't damage the rafters. When done sawing, remove the cut plywood/decking from the ridge.
If you are layering new roof shingles on the entire underlayment, leave enough space along the ridge over which you will install the vents.
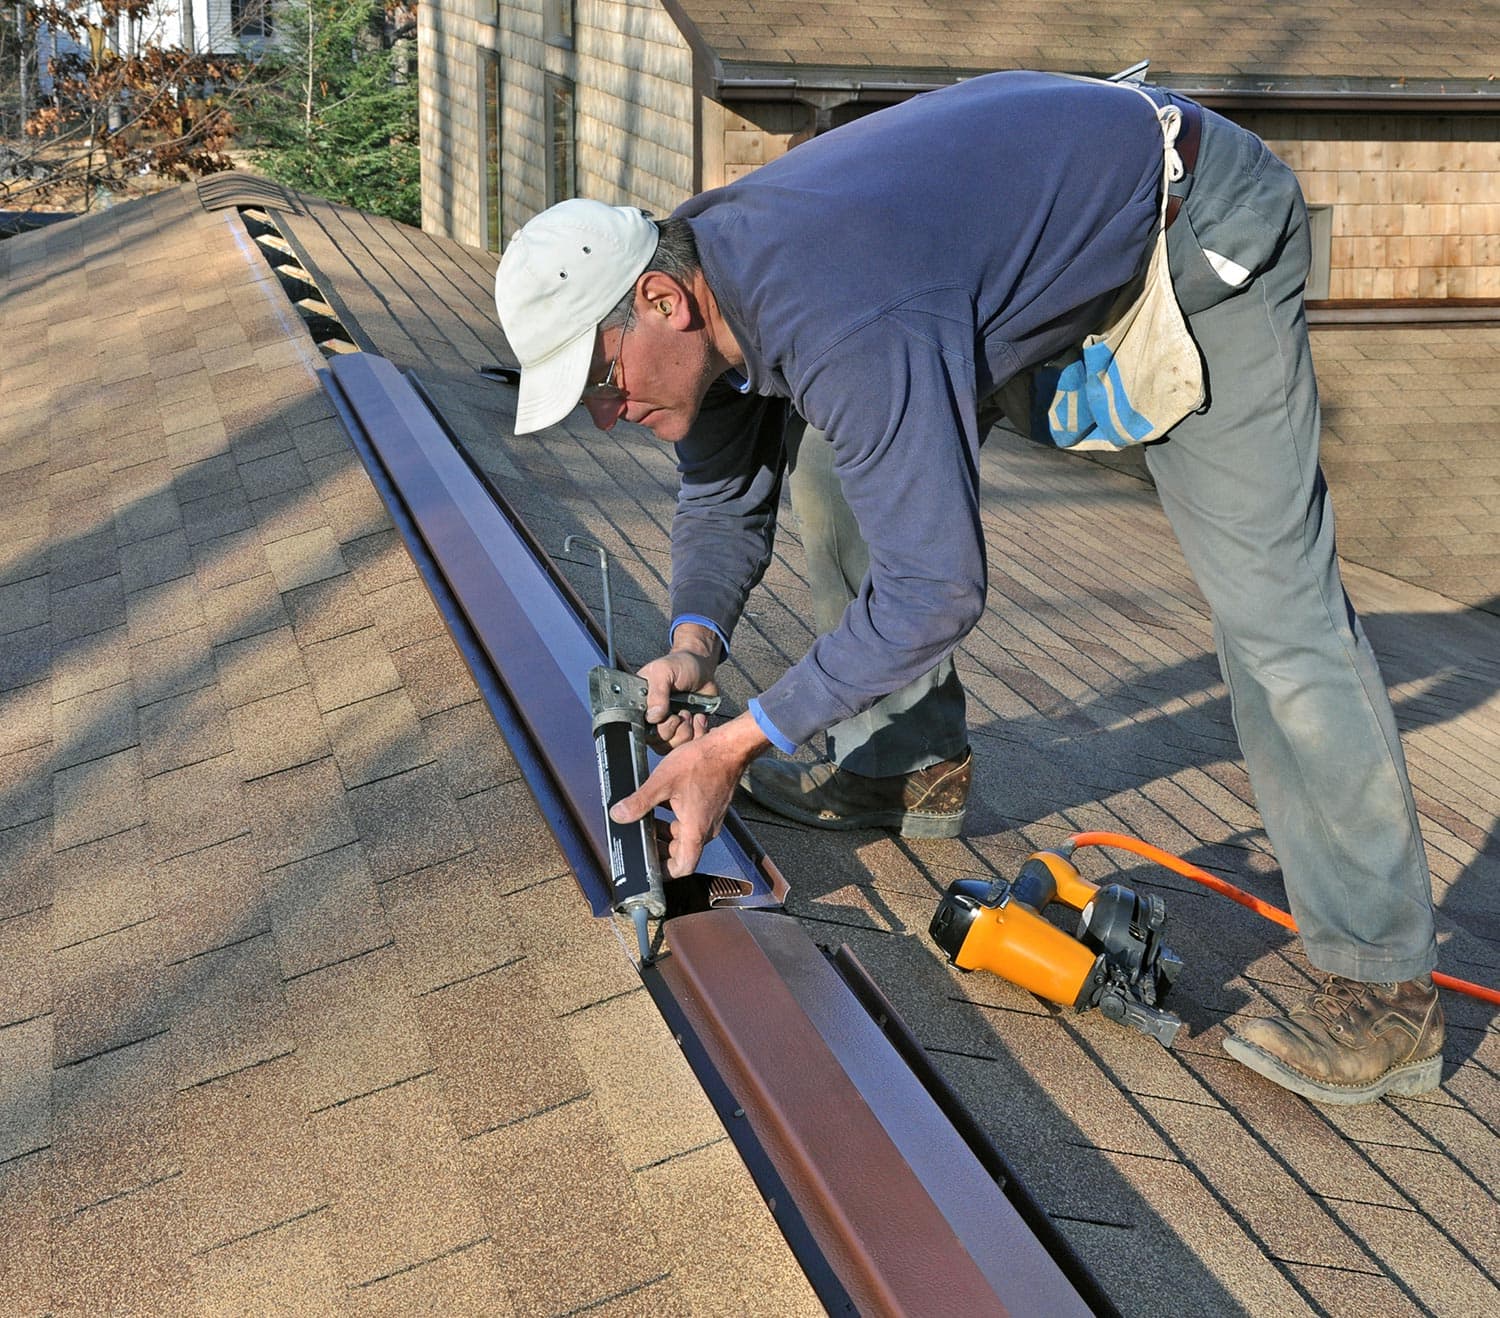
Install the ridge vents
Before proceeding with the installation, you should know about the two main types of ridge vents:
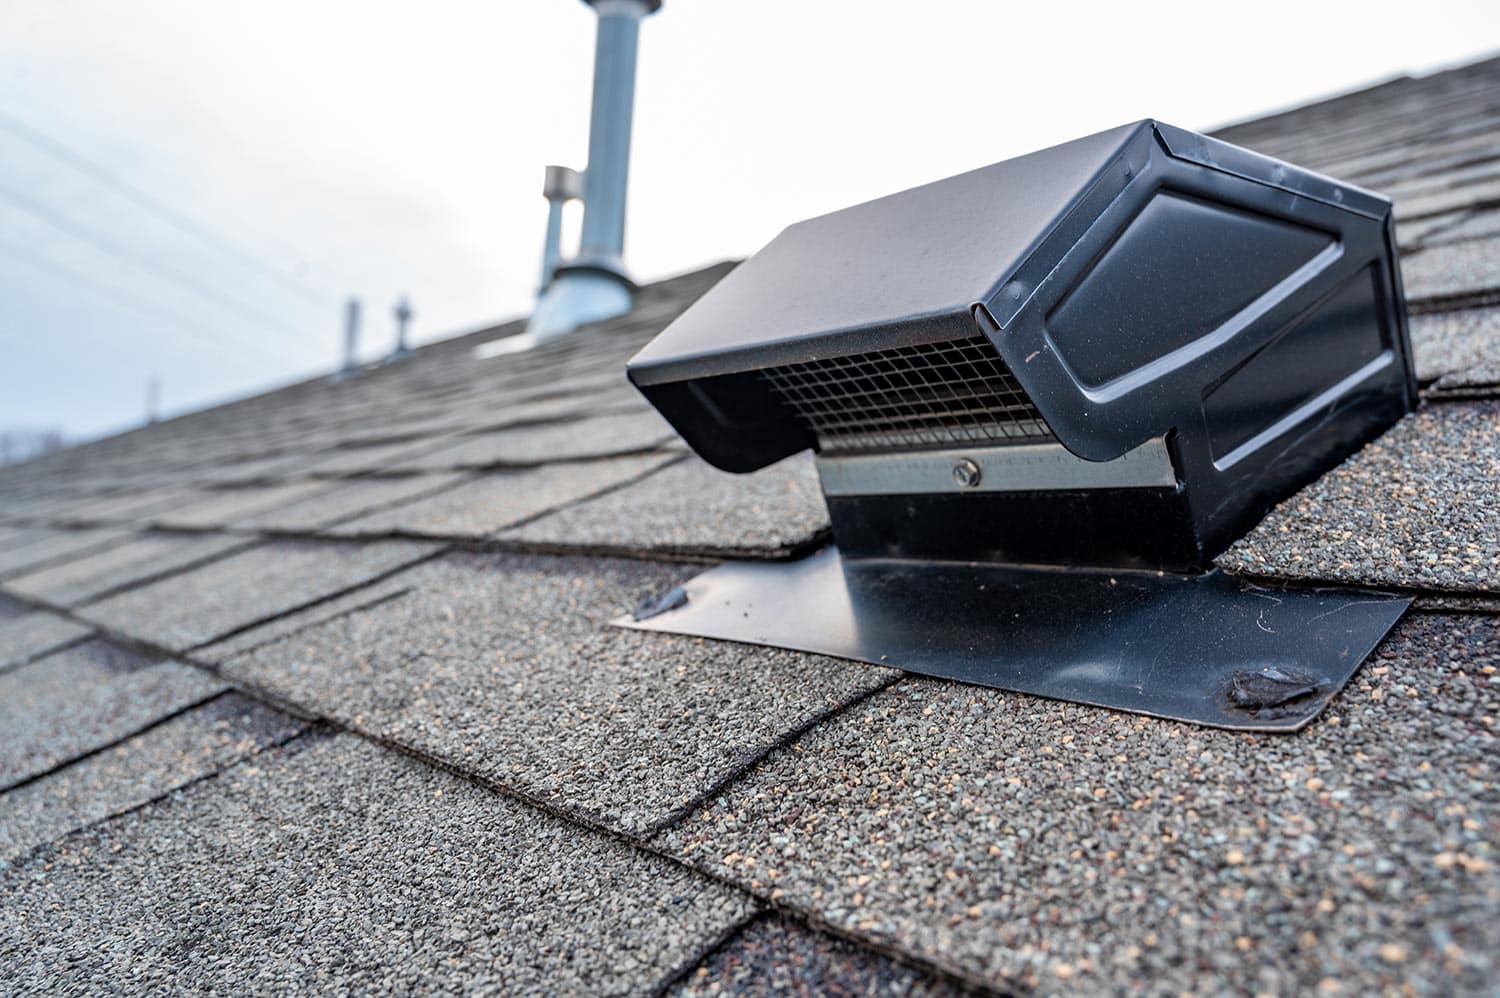
Shingle-over-ridge vent
This type is installed on the ridge of a roof and should be covered using asphalt shingle caps. Compared to an aluminum ridge vent, this looks nicer because it has a design consistent with other roof shingles.
Aluminum ridge vent
When viewed cross-sectionally, this vent looks like a mushroom. However, this type is more susceptible to leaks during the cold and rainy seasons because its nails/fasteners are readily exposed. Regular application of sealant can prevent leakage.
Other types of ridge vents
Aside from metal vents, some are made of copolymer resins or simply plastic. You should know the correct installation methods depending on which type you opt to use.
Place the vent on top of the opening, nailing one side (slope A) before the other (slope B). While a nail gun makes the job faster and easier, roofing experts highly recommend hand nailing.
By hammering the nails yourself, you can avoid creating dents in the plastic or aluminum vents, and you can readjust the vents quickly if needed.
Vents are typically pre-perforated, meaning a series of tiny holes is already on them, so you will know exactly where to drive the nails. Additionally, some vents come with a bag of nails in the package for you to use. Using nails is a great way to fix the ducts in place, but you may also use long screws if desired.
Should you need to cut the excess section of vents during the installation, use a pair of tin snips or any utility knife. Remember also that during times of high temperatures, the ridge vents contract, so do not assemble them too tightly against each other.
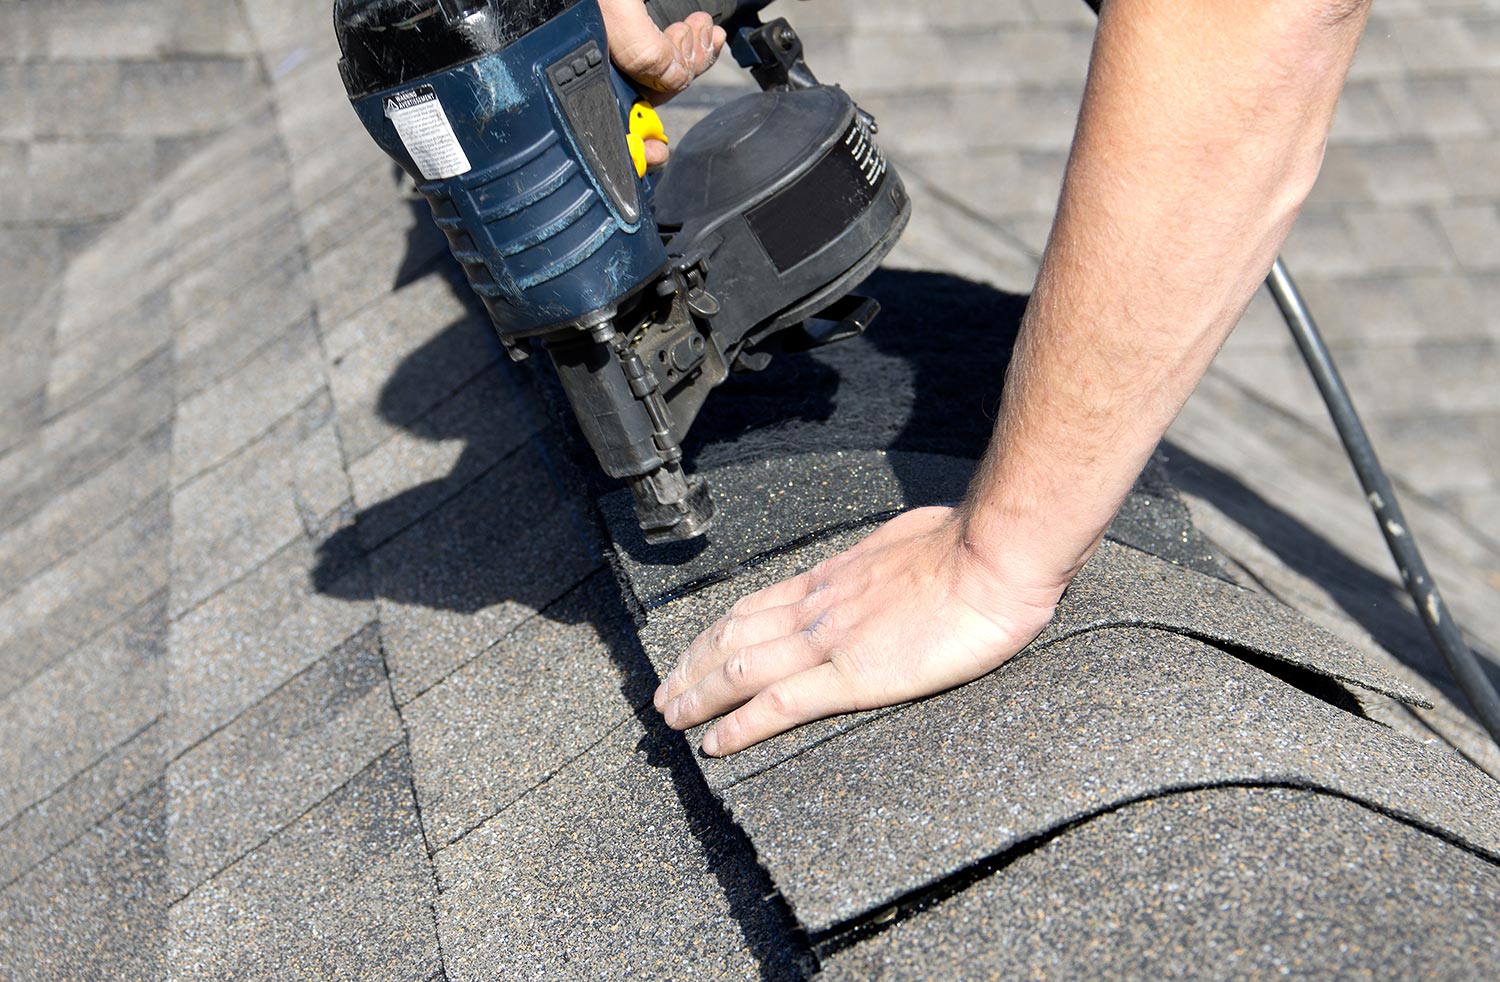
Install the shingles over the vents
If you are using an aluminum vent, there is no need to use shingle caps to cover it, but you can use shingle caps over plastic vents. Choose shingle caps that have the same design as the surrounding shingles.
You can use a nail gun to install the shingle caps over the vents this time. Use just the right amount of effort so you don't install them too deeply. Then cap off the final section of the ridge by inserting an end plug flushed with the roof's end.
Why Install Ridge Vents?
Although not all types of roofing can have ridge vents, installing them is aesthetically pleasing and has other advantages. Below are some reasons why.
Improve attic ventilation
With ridge vents, the possibility of mold and mildew growth is lessened with adequate ventilation. Studies show that proper ventilation prevents moisture buildup from condensation. As a result, microorganisms will have no place to thrive.
Promote adequate airflow
The attic isn't the only area that benefits from ventilation. The space just beneath the roof benefits as well. Working in conjunction with the soffit vent, a hole near the roof edge that allows outside air to enter the attic, the ridge vent ensures optimal air circulation.
Remember that a cool roof makes a house feel relaxed and comfortable, while a hot roof makes a place feel warm.

Check out this soffit vent on Amazon.
Extend roof longevity
When a homeowner fails to address the growth of molds, the roof's structural layer (i.e., joists, trusses, and rafters) will start to rot. To prevent this, a regular flow of fresh air is needed to eliminate moisture and warm air. This is exactly what ridge and soffit vents provide.
Prevents the entry of pests
Warm air gets out, but pests or small animals can't get in through the ridge vents. The vent's openings are small enough for air to pass through and to prevent pests from occupying your attic.
What are Active and Passive Roof Vents?
Aside from shingle-over and aluminum ridge vents, other vents can help facilitate ventilation in your attic.
Some are classified as active vents because they're designed to be mechanical or electrical, while some are passive because they're static and rely only on the wind's natural force to initiate air circulation.
Active roof vents
Active roof vents work by pulling outside air into the attic and expelling warm air through the exhaust vents. The most common examples of active roof vents are turbine vents, power vents, and solar-powered vents.
Turbine vents
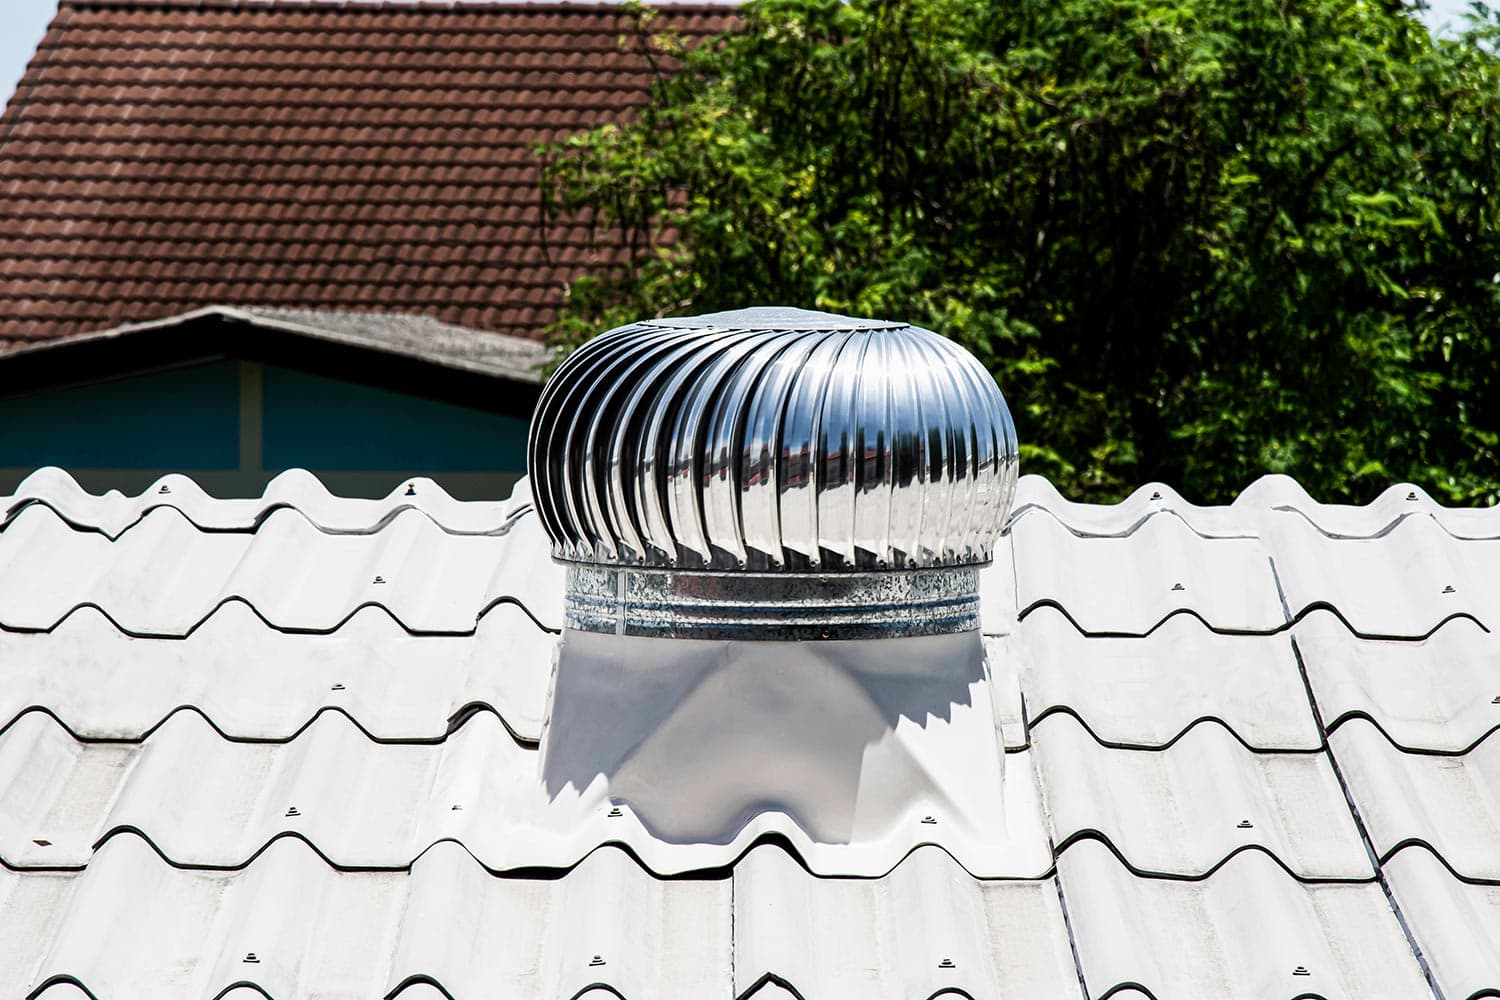
Unlike the following two vents on the list, turbine vents (aka whirlybird turbines) create rotary motion due to the power of wind and air pressure. As they rotate, they vent out stale, hot air and moisture from the attic.
Power vents
Power vents have motors that work using electricity and are usually installed near the ridge of a roof. These vents prevent humidity buildup in the attic by pulling the hot air.
Power vents are commonly used in non-windy places and places where winter temperatures fluctuate from time to time. They are also perfect for roofing where passive venting is not feasible.
Solar-powered vents

These motor-driven exhausts are powered by stored solar energy and shut down when they need to recharge. Though economical for your energy bill, solar-powered vents aren't very reliable during cold, rainy seasons. They are also a bit pricey compared to other vents.

Click here to see Solar vents on Amazon
Passive roof vents
Wind and convection make passive roof vents work efficiently. Convection takes place when warm air rises while cold air goes down. Static vents, gooseneck vents, and gable end vents are the most common examples of this type.
Static vents
These vents (aka turtle or shingle vents) are like boxes on the roof through which hot, stale, moist air escapes from the attic. You will need to install several static vents to create efficient ventilation in the attic.
Gooseneck vents
Gooseneck vents are installed on a shingled roof to provide an exit path for warm air from the bathroom or kitchen. An exhaust fan is directly connected to a gooseneck vent through a pipe. This type of vent usually works with dampers and exterior grills to prevent the entry of animals and insects.
Gable end vents
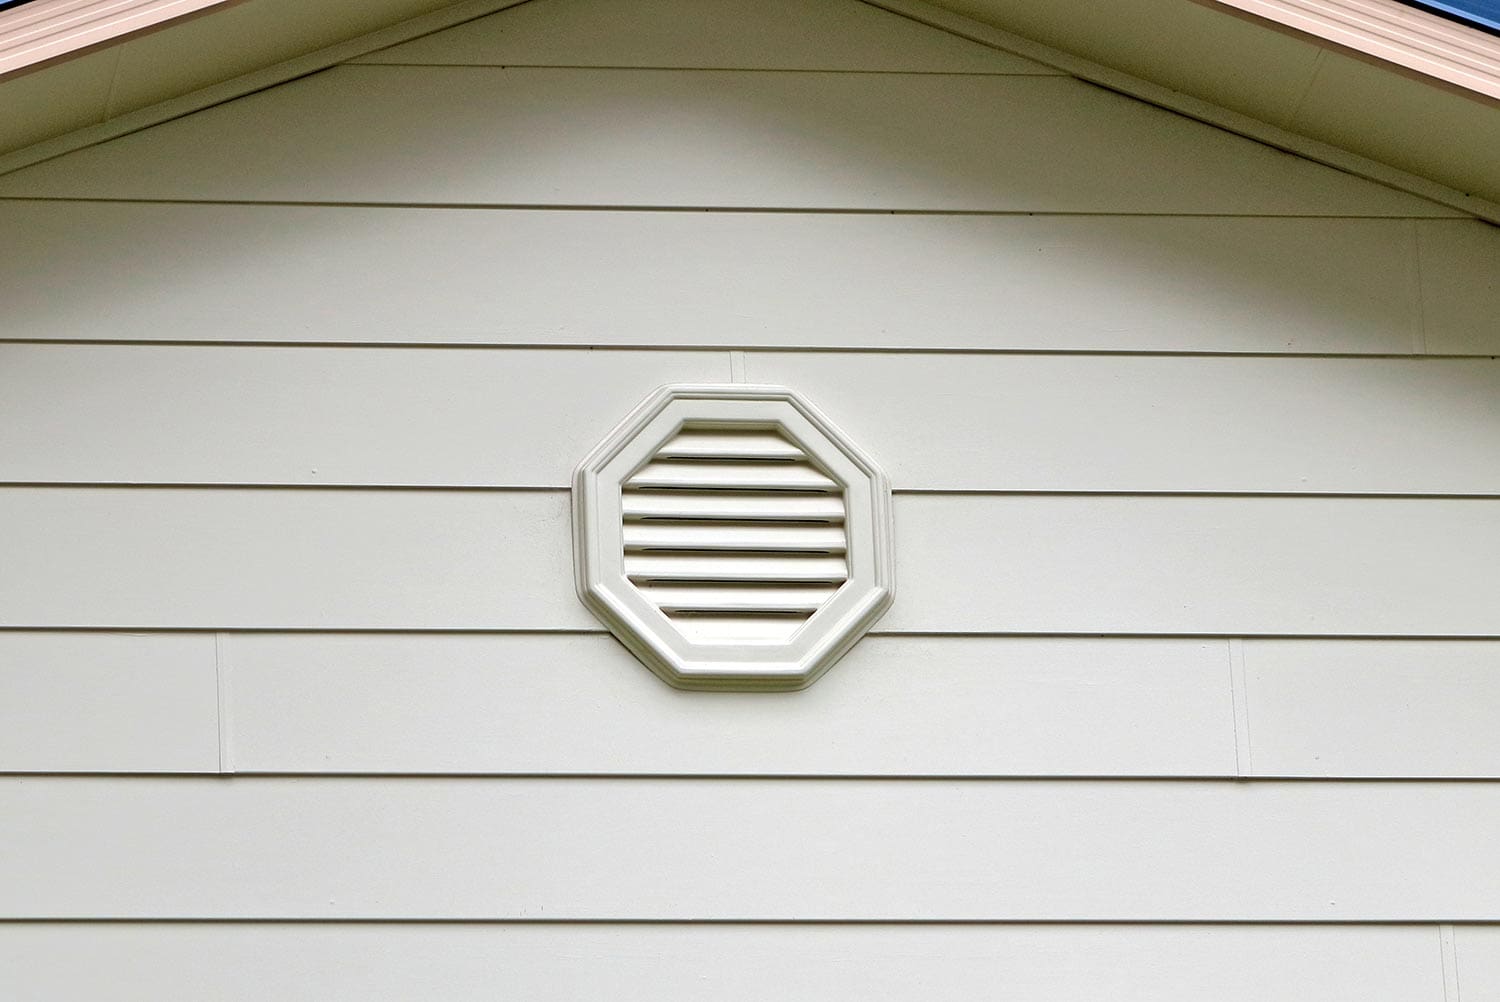
These vents are installed on the opposite exterior walls of an attic and usually work in pairs to ensure proper airflow within your attic. To keep these vents more functional, some homeowners install attic fans.
Now that you're aware of the different types of vents, remember to keep them clean and open. You should not cover them, even during winter.
Final Thoughts
Ridge vents allow you to moderate the temperature of your roof and attic, making it easier for your air conditioning system to cool your home. These useful vents also guarantee a longer lifespan for your roof structure by creating proper and adequate airflow.
If you're not sure which vents should be installed on your roof, talk to an HVAC technician.
To learn more about roof ventilation and installation, check out these posts: