
Are you wondering if you can tape a vapor barrier and what steps might be involved in the process? Well, you've come to the right place! We have thoroughly researched this topic for you and found the answers.
Vapor barrier tapes are required to enable the effective installation of vapor barriers. This is crucial for many applications, including sealing, seaming, and repairing vapor barriers. To properly tape a vapor barrier, follow the steps below:
- Prepare the vapor barrier.
- Apply the acoustic sealant.
- Stretch and secure the vapor barrier.
- Add more sealant.
- Cut holes.
- Apply vapor barrier tape.
- Squeegee the tape.
- Try not to touch the tape.
- Add more layers of tape.
- Cure the tape.
Keep reading as we dig deeper into vapor barriers, especially the procedure for taping it. We'll also discuss the factors in choosing the right tape, tips for taping, and more.
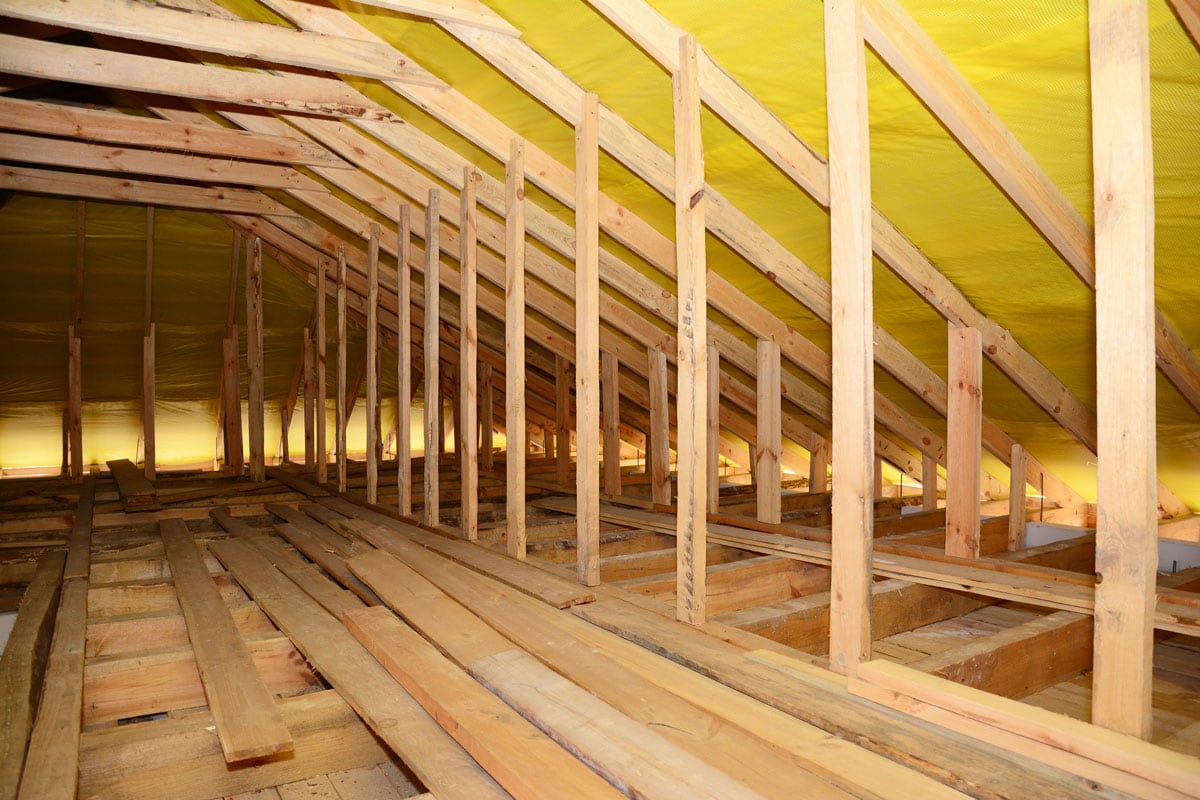
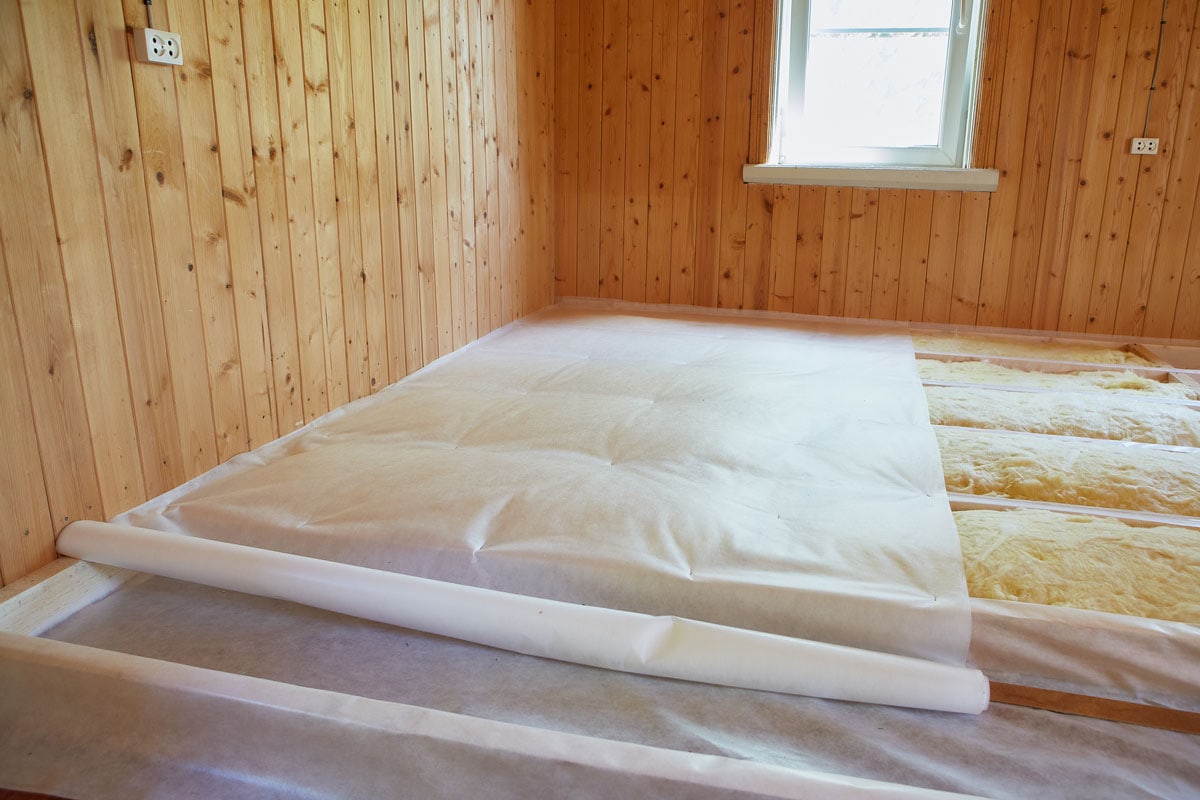
![Covering mineral wool insulation inside a country home, Should Vapor Barrier Be Taped? [And How]](https://hvacseer.com/wp-content/uploads/2022/06/Should-Vapor-Barrier-Be-Taped-And-How.png)
What Are Vapor Barriers?
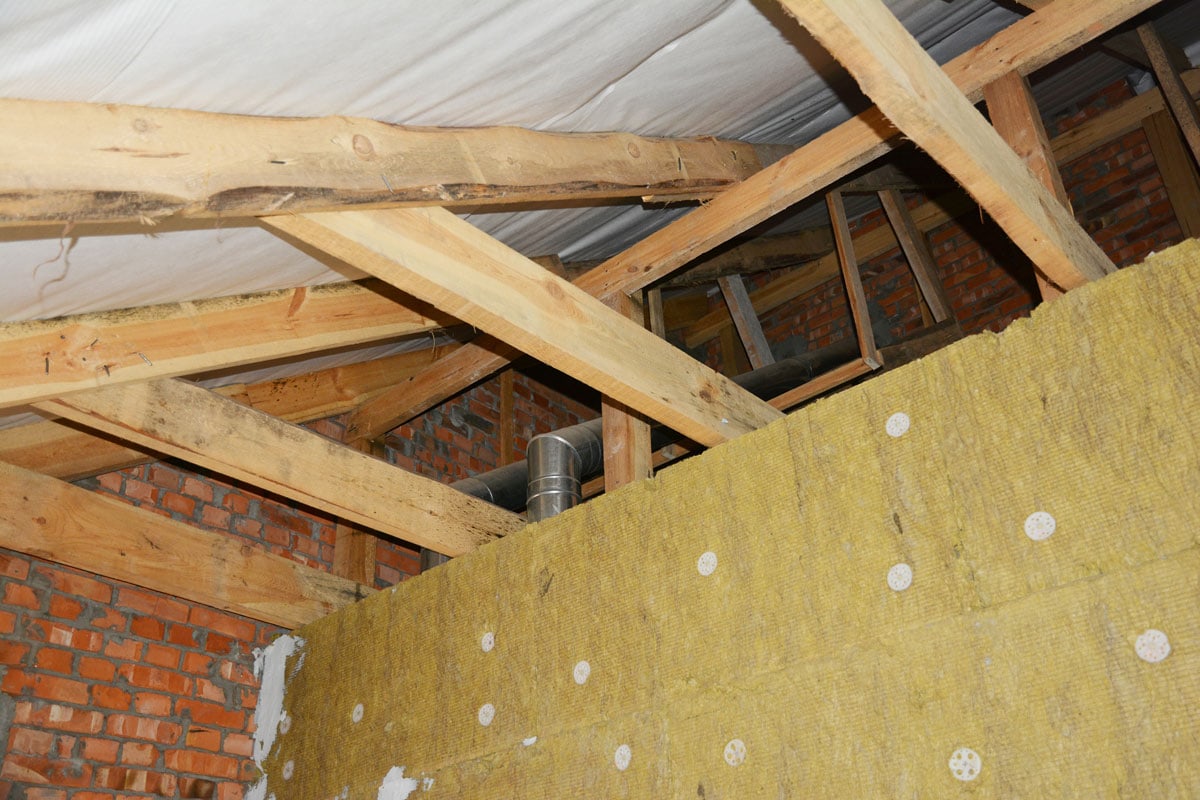
Vapor barriers offer an extra layer of security by reducing moisture and airflow in concrete slabs, foundations, basements, and crawl spaces. These barriers decrease damage, mold growth, musty odor, and water penetration while saving time, money, and energy.
Vapor barriers offer varying levels of protection depending on the use, cost, and requirements of the contractor or installer. The different types, such as polyethylene film, woven textiles, and substrates covered with metal or foil, offer various degrees of permeance or water vapor transfer.

To ensure the efficient installation of a vapor barrier, pressure-sensitive vapor barrier tape is needed. It is essential in sealing, mending, and seaming the vapor barriers during numerous applications.
How to Tape the Vapor Barrier
Before taping the vapor barrier, you remove out any objects that are stored there so that you have free access to the area you'll be covering. Prior to beginning, it's also crucial to dry up the crawl area as much as you can.
Prepare the installation tools as soon as the crawlspace is tidy and reasonably dry. Then follow the steps below to tape the vapor barrier:
1. Prepare The Vapor Barrier.
Select the vapor barrier film of your choice. Prepare the walls with the vapor barrier film.

Click here to see this polyethylene film on Amazon.
2. Apply Sealant.
Put the acoustic sealant of your choice on the outside of the wall. Make sure the wall is properly sealed.
Click here to see this caulk sealant on Amazon.
3. Stretch And Secure The Vapor Barrier.
Stretch your vapor barrier out against the wall. Then secure it with a staple gun. Use as few staples as you can, since you want your vapor barrier film to have as few perforations as possible. This will guarantee that the film creates an airtight envelope on your wall.
Click here to see this staple gun on Amazon.
4. Add More Sealant.
Installing an additional acoustic sealant as the main sealer for corners and seams is an option if necessary. For the best contact and sealing, remember to push the film against the acoustic sealant.
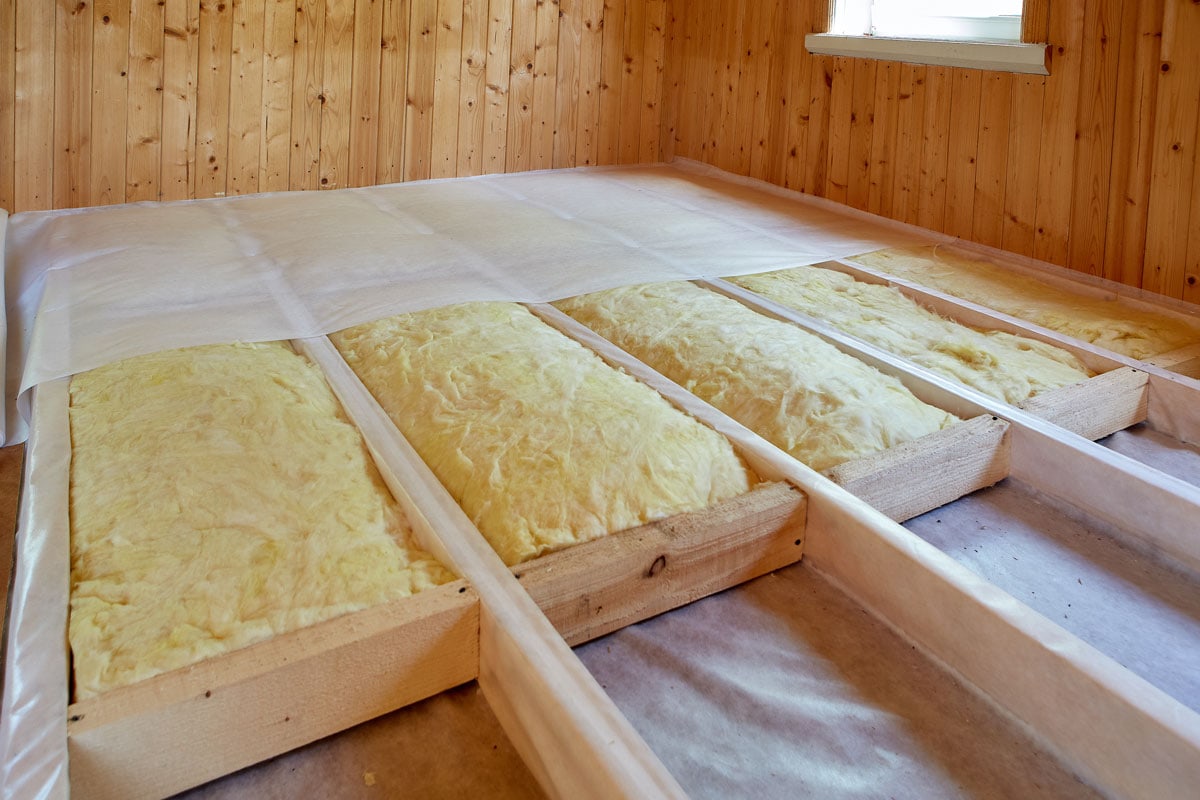
5. Cut Holes.
Make holes for electrical boxes and outlets and seal them appropriately, if necessary.
6. Apply Vapor Barrier Tape.
On the ends and seams of the vapor barrier film, apply the vapor barrier tape. To make a flawless seal, patch up any holes, tears, and seams.
Click here to see this vapor barrier tape on Amazon.
7. Squeegee The Tape.
Squeegee the tape into the nooks and crannies of the surface. You can use your hand and a towel as an improvised squeegee if you don’t have the actual tool. Make sure there are no air bubbles between the tape and the film.

Click here to see this silicone squeegee on Amazon.
8. Try Not To Touch the Tape.
To prevent weakening the tape, avoid touching it.
9. Add More Layers Of Tape.
To ensure the tape's optimum durability and strength, add another 2-3 layers.
10. Cure The Tape.
Allow the tape 1 to 2 hours to cure.
A demonstration of taping a vapor barrier is shown in the video below.
What Are The Factors In Choosing The Best Tape for a Vapor Barrier?
With so many different kinds of tape available today, choosing the right one for a vapor barrier can have a big impact on a building or a home's durability, energy efficiency, and indoor air quality (IAQ).
Take into account the following factors when choosing what kind of tape to purchase for a vapor barrier:
Adhesion
This is a crucial quality for tape. The tape should stick in any weather or temperature without losing its adhesion over time. But it should not be so sticky that it's impossible to work with. Use tape that has been evaluated for performance in the environment in which it will be used.
Splitability
You can save time and frustration by using vapor seal tape that has indicated edges since it is easy to cut or split for application.
Flexibility
Flexible tape speeds up the application because it enables you to swiftly seal around any penetrations or tight angles. However, it must also be strong enough to withstand the demands of the project.
Longevity
Some tapes will deteriorate or become worn over time, weakening seal points and compromising structural durability. By keeping out moisture or air particles that can result in the mold that can cause structural damage, the best tape for a moisture barrier should have the following:
- Over the period of the construction project, it should have sufficient tensile strength, remain flat, and preserve its shape against the vapor barrier.
- Choose tape with superior air and moisture resistance and low permeability to guarantee long-term durability.
- Since UV rays can cause the tape's physical characteristics to deteriorate, good construction tape offers UV protection.
Indoor Air Quality
The tape should help maintain good IAQ. In certain people, mold can cause breathing difficulties, allergies, and even inflammation because it releases irritants and allergens. Choose tape that is toxin-free for the health and wellbeing of those who are working or living in a building.
Cost
Vapor barrier tape comes in many different varieties with different prices. To protect the building, the finest tape for vapor barriers must offer long-lasting adhesion, durability, and resistance to air, moisture, low permeability, and UV radiation.
What Are Some Vapor Barrier Tape Tips?
Focus on the following for the most productive vapor-tape usage:
Never Compromise On Quality
It is worth spending more money to ensure the task is completed effectively, whether you hire a contractor or do it yourself. This is especially true if it helps you avoid more costly issues in the future.
The vapor barriers described in the American Society for Testing and Materials (ASTM) E1745 can be sealed effectively with vapor barrier tape, which is required to conform with ASTM E1643. The powerful adhesion and film of these tapes work well for sealing, seaming, and protecting in even the most demanding applications.
Apply Properly
The key is application. It's crucial to pay attention to applications for the strongest, longest-lasting seal. It's important to get a smooth seal. Therefore, many experts recommend applying vapor tape with a squeegee rather than your hands and avoiding using screws or nails if possible.
Monitor And Maintain
Vapor tape is a small expenditure that can provide major results. A safe, dry environment can be maintained by paying attention to it over time and ensuring that your vapor barrier continues to function correctly.
When Is It Necessary To Use Vapor Barriers Or Vapor Barrier Tape?
Most experts believe that vapor barrier tape is important in some circumstances but not always as a whole-house solution.
The majority of specialists advise that vapor barriers should only be used under specific circumstances, and that the type of vapor barrier utilized should be appropriate for the environment, region, and type of wall construction.
Vapor barrier requirements or circumstances for the majority of dwellings in humid southern regions are different from those for wood-sided homes in cooler, dryer climates.
For instance, installing a vapor barrier in a brick-built home or office in a humid southern region differs substantially from doing it in a home with wood siding in a cold area.
When selecting whether and how to install vapor barriers, it's crucial to refer to the most recent recommendations made by your local code officials. The following are the scenarios when vapor barriers are most frequently advised:
High Humidity Areas
To prevent moisture damage in some areas of the house, vapor barrier protection should be installed in high humidity locations such as bathrooms, greenhouses, and places with spas or swimming pools.
Houses In Hot & Humid Climates
An exterior vapor barrier that prevents outside humidity from entering the interior walls may be beneficial for homes in extremely hot and humid climates.
Extremely Cold Climates
When living in a particularly cold area, installing polyethylene plastic vapor barriers between the inner wallboard and insulation can help keep the wall cavity from becoming damaged by condensation-related moisture.
Below-Grade Walls And Floor Slabs
Concrete walls or slabs in homes with below-grade areas allow ground moisture to pass through. Before wood framing or flooring materials are installed, a vapor barrier against the concrete surface is typically advised.
Basement Crawl Spaces
A polyethylene moisture barrier laid directly on top of the exposed soil is beneficial for homes with basement crawl spaces.
Final Thoughts
An easy and affordable solution to safeguard your home against moisture is to install a high-quality vapor barrier. With the appropriate vapor tape as well as following the steps mentioned above, you will significantly keep surfaces and spaces secure from damage, mold, mildew, and other issues.
For more valuable information, check out the related posts below.