
If you have purchased a mini-split ceiling cassette unit for your home and are now wondering if you can complete the installation yourself, don't worry! We have researched to provide you with all the essential information you need when installing a mini-split ceiling cassette at home.
Mini-split ceiling cassette condensers come with an installation manual for every unit.
Different manufacturers will print out specific instructions for their products, so check your unit's instruction manual.
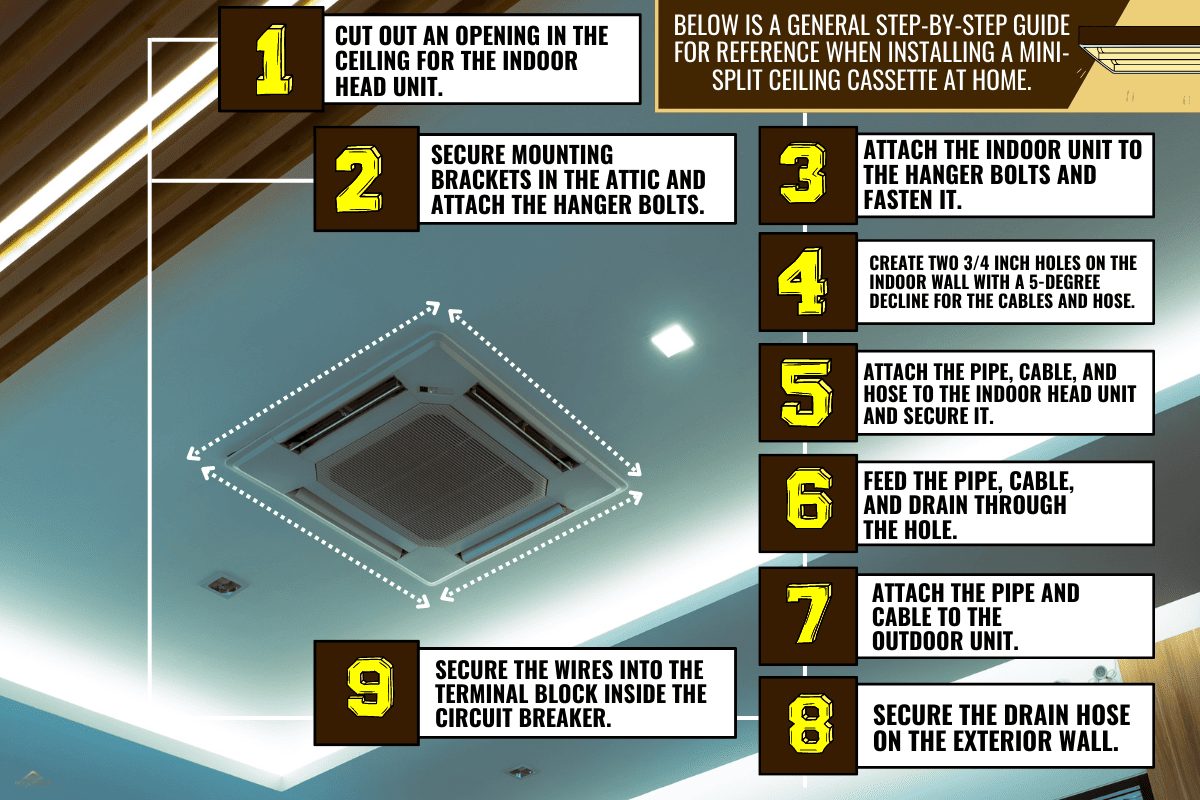
Below is a general step-by-step guide for reference when installing a mini-split ceiling cassette at home:
- Cut out an opening in the ceiling for the indoor head unit.
- Secure mounting brackets in the attic and attach the hanger bolts.
- Attach the indoor unit to the hanger bolts and fasten it.
- Create two 3/4 inch holes on the indoor wall with a 5-degree decline for the cables and hose.
- Attach the pipe, cable, and hose to the indoor head unit and secure it.
- Feed the pipe, cable, and drain through the hole.
- Attach the pipe and cable to the outdoor unit.
- Secure the drain hose on the exterior wall.
- Secure the wires into the terminal block inside the circuit breaker.
While mini-split ceiling cassette condensers come with a set-up manual, the installer should have enough knowledge about proper drainage set-up, wiring, and cutting holes through the ceiling and walls. Continue reading as we discuss more critical information for a home setting up a mini-split ceiling cassette.
How Do I Install A Mini-Split Ceiling Cassette?
Mini-split condensers offer a sleek alternative to bulky traditional air conditioners because the body can be installed in the ceiling, giving the mini-split cassette a flat appearance. However, this makes the installation more complicated because the unit has to be installed inside the attic.
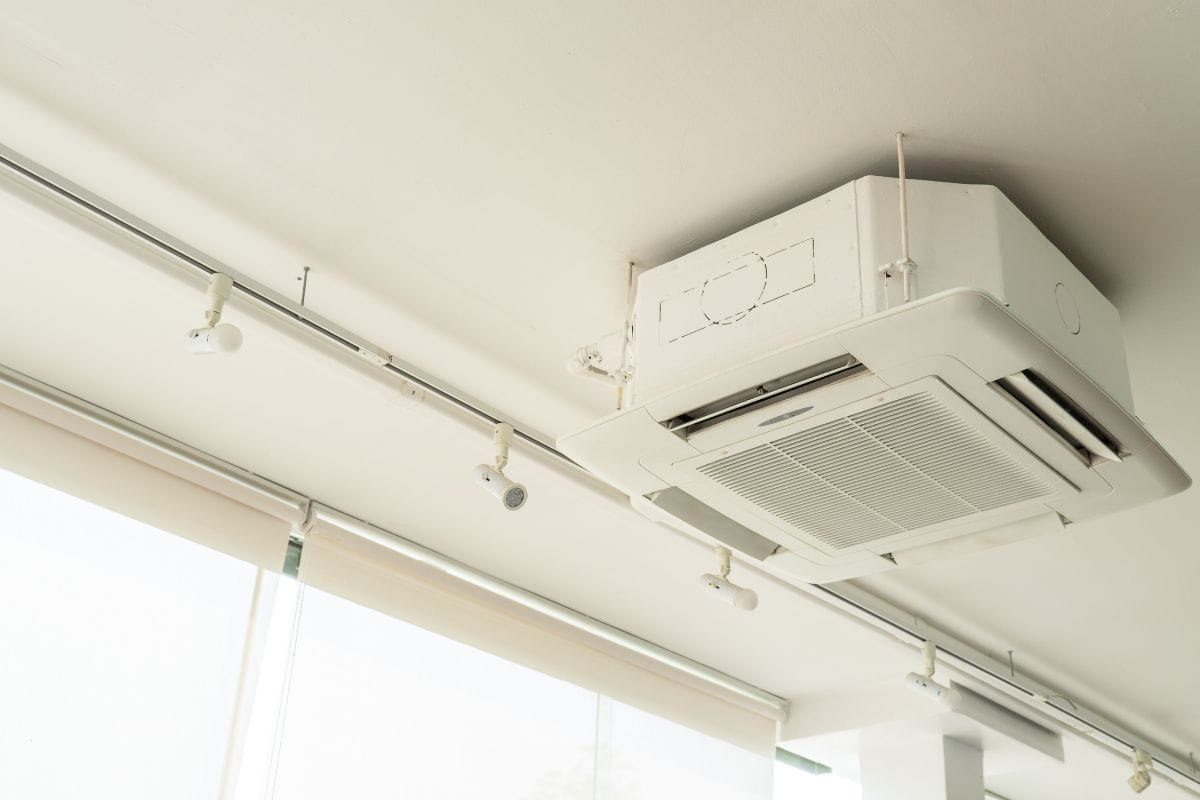
To install the mini-split cassette unit inside the attic, you need to cut a square opening in the ceiling. Afterward, the unit must be hoised up, if not carried all the way up into the attic, to fasten it to the brackets.
After fastening the head unit, you must connect multiple hoses, pipes, and cables. These objects would then need to be arranged through the walls to allow a thorough run of the refrigerant and drained liquid from the indoor to the outdoor, and vice versa.
The refrigerant pipe and drain hose are just some tubes that must be connected to the indoor and outdoor units. Electrical wiring and bending of the refrigerant pipes are also required to complete the process.
In addition to a more complex installation process, the steps for setting up a mini-split cassette could vary depending on the specific unit manufacturer you brought.
Below is a general step-by-step ">guide you can refer to for setting up a mini-split cassette condenser at home. Remember that alongside the following instructions, you should still read your specific unit's manual.
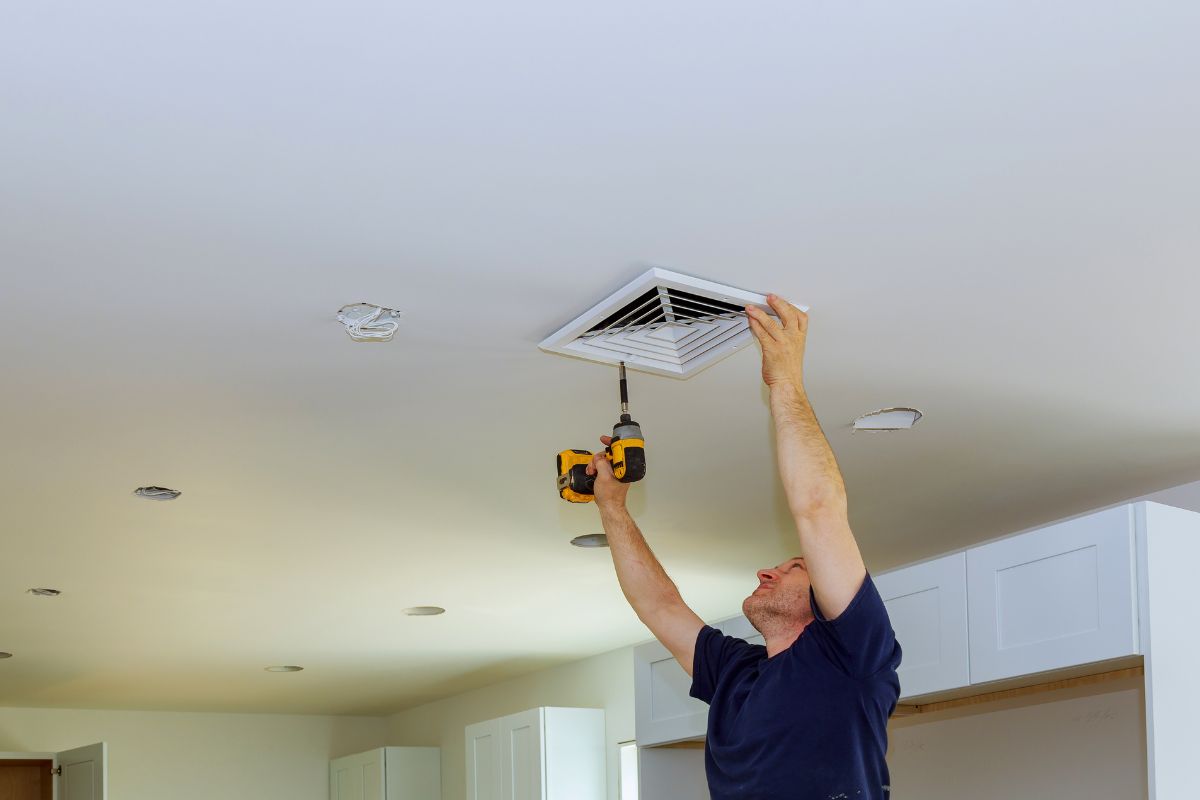
Cut An Opening In The Ceiling
Some mini-split units will have a size reference board when you purchase them, which you can use when measuring the hole size for the indoor head unit. If you need help, you can take the measurements of the cover panel of the unit.
Do not create an opening with measurements taken from the head unit itself because space should be left between the unit and the door's outline. If no size reference boards are available with the unit you bought, please look at the dimensions provided in your manual.
In some attics, the joists can provide too little space for the size of the head unit of a mini-split cassette. In this situation, you can choose to cut through the joist to give enough room for the head unit.
After installing the board for the mini-split, you can use a double-header board against the ends of the cut joists. This will provide more stability for the ceiling area where the indoor head unit will be fastened.
Watch this YouTube video for a detailed demonstration:
Secure Mounting Brackets
After creating the opening for the indoor head unit, you can install the brackets included in the installation set. If they are unavailable to you, you can choose to fashion brackets by fastening 2x4s between the rafts below the roof.
Once the bracket is safe on the attic's rafts, secure the hanger bolts to the bottom edge of the bracket. Four hanger bolts must be available for the four corners of the indoor head unit.
Attach the Indoor Head Unit
Use a ladder to carry the indoor head unit to the opening in the ceiling. It is important to remember that assistance must be present when moving the indoor head unit up a ladder.
Sometimes, the head unit must be carried up to the attic, where it can be fastened to the brackets. Once the head unit is hooked into the four brackets, use a wrench to tighten the bolts.
Create a Hole For The Piping, Wire, and Drain Hose
From the indoor wall, create two 3/4-inch holes near the area where the outdoor condenser unit is installed. There must be a 5-degree downward slant to the outdoor wall to create a more effortless flow for the refrigerant and gas.
A sufficient altercation must be done depending on the materials available to you. This means that if the refrigerant lines, cables, and wires are too small for the hole, you should apply a sealant or caulk to prevent leakage.
You can also choose to insert a wall sleeve. Wall sleeves support the hole, preventing the wall from deforming.
Attach The Pipe, Cables, And Hose To The Head Unit
Before attaching the pipes, cables, and hose, ensure you have measured the entire distance from the indoor head unit to the outdoor unit.
Observe all the turns and bends the lines make while running through the house. This will add to the overall length you need when arranging the lines toward the outdoor unit.
Feed The Pipe, Cable, And Drain Through The Hole
Ensure that sufficient insulation is attached to the pipes before feeding them through the hole in the wall. Proper insulation will extend the life of your unit and prevent damage to your walls.
Attach The Pipe, Cable, And Drain To The Outdoor Unit
Once the refrigerant pipe, wire, and drain hose are secured through the hole, connect the appropriate cables to the outdoor unit.
Depending on the space from the hole to the outdoor unit, you can choose to bend the refrigerant lines. To prevent grounding and short circuits, protect cable wire with insulation.
Secure Drain Hose To Exterior Wall
Regardless of the arrangement of your mini-split cassette's drain hose, the outdoor portion must be fastened downwards to allow the liquid to empty well. This will also ensure that the condenser's pipes will stay clear from the indoor head unit.
Plumbing straps can be used to secure the drain to the wall. These straps will prevent the hose from being moved to a position where the water will not flow downward.

Click here to shop for plumbing straps on Amazon.
Secure The Wires To The Circuit Breaker
After the hose is secured on the wall, the wiring must be set up to the circuit breaker. Ideally, the outdoor unit must be close to an available power source.
To connect the appropriate wires to the circuit breaker, refer to the provided outdoor unit illustration or the installation manual. Generally, the air condenser will require three wire lines, with one ground.
In some instances, the wires provided are labeled. Make sure to refer to your own unit's manual to check which wires should be attached to the circuit breaker.
Are Mini-Split Ceiling Cassettes Better Than Mounted Mini-Split?
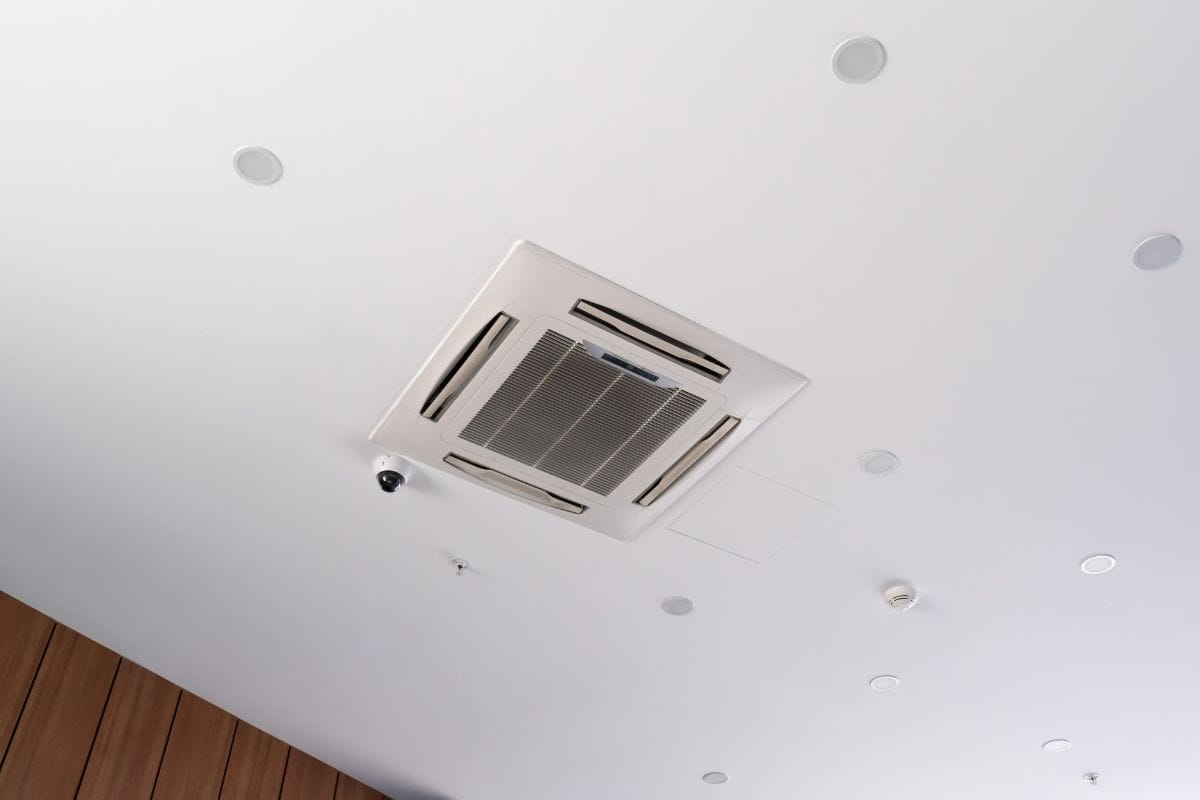
In terms of saving space, mini-split ceiling cassettes are better than wall-mounted mini-splits. The indoor head unit is hidden inside the attic, so the mini-split ceiling cassettes deliver a sleeker appearance.
Much like a central air conditioning system, only the vent will be visible from the indoor space. However, the ceiling cassette is ductless, saving space better than a central air system.
To save energy and money, mini-split cassettes are similar to mounted mini-split.
A mini-split system is better for providing cool or warm air to specific home areas without wasting energy on unused rooms. This can save you money in the long run.
Are Mini-Split Ceiling Cassettes Cheaper Than Central Air?
The price of installing a mini-split at home will depend on whether you choose to have a professional install it or if you do it yourself. The number of indoor head units installed will also affect the price.
Generally, the upfront cost of a mini-split is more expensive than a central air unit. However, this price does not include installing the required ductwork in major air systems.
Mini-splits do not require ductwork. Once they are installed and connected to a power source, they can operate immediately.
To Wrap Up

Mini-split ceiling cassettes can be installed inside the home's attic. In this article, we discussed the general process of installing a mini-split ceiling cassette at home.
We also discussed if the mini-split ceiling cassette type is better than the mounted type, as well as the cost of installation. Make sure to observe proper precautions when installing the unit in your home to avoid damage or injury.
Have you made it to the end? Check out some of our other related posts!
Can You Put A Mini Split Condenser In The Basement? [Yes! Here’s What You Should Know!]