
Do you need to clean your Lasko fan, so you’re interested to know how to take it apart and put it back together? You’ve come to the right place, for we have researched this question, and we have the answer for you.
Here are the summarized steps to take apart a Lasko stand and pedistal fan:
- Turn off your Lasko fan and unplug it.
- Remove the front grill.
- Remove the fan blade lock.
- Pull out the fan blade.
- Remove the lock for the rear grill.
- Remove the rear grill.
Read the detailed steps on how to take apart a Lasko stand fan in the sections below. Additionally, the steps to put it back together can also be found in the succeeding sections. Read on!
How to take apart a Lasko fan?
Fans require periodic cleaning because they easily capture dust and other airborne debris like lint and fur. The effectiveness of a fan drops as more dust and debris find their way into the grills.
Dust on the front and rear grills reduce airflow. Once the airflow is reduced, you will need to set the fan to a higher speed to get your desired cooling.
Taking your Lasko fan apart is the best way to clean it. This way, you can use soap and water to get rid of dirt and dust in the grills without getting the electrical components wet.
The steps above to take apart a Lasko stand fan also apply to take apart a Lasko pedestal fan.
Removing The Front Grill

The front grill is connected to the rear grill by a plastic clip. Together, they create a protective shell that keeps everything safe from the fan blades whenever it is spinning.
The flexible plastic that keeps the front grill in place is secured to the rear grill. This flexible plastic acts like a clip that holds the rim of the front grill and keeps it attached to the rear grill.
To remove the front grill, gently pry the plastic to loosen its grip on the front grill. You can use your fingers or a rigid plastic like a guitar pick. Be careful when prying on the plastic because it can be sharp sometimes.
Pull the front grill off the plastic clip once it is loose enough.
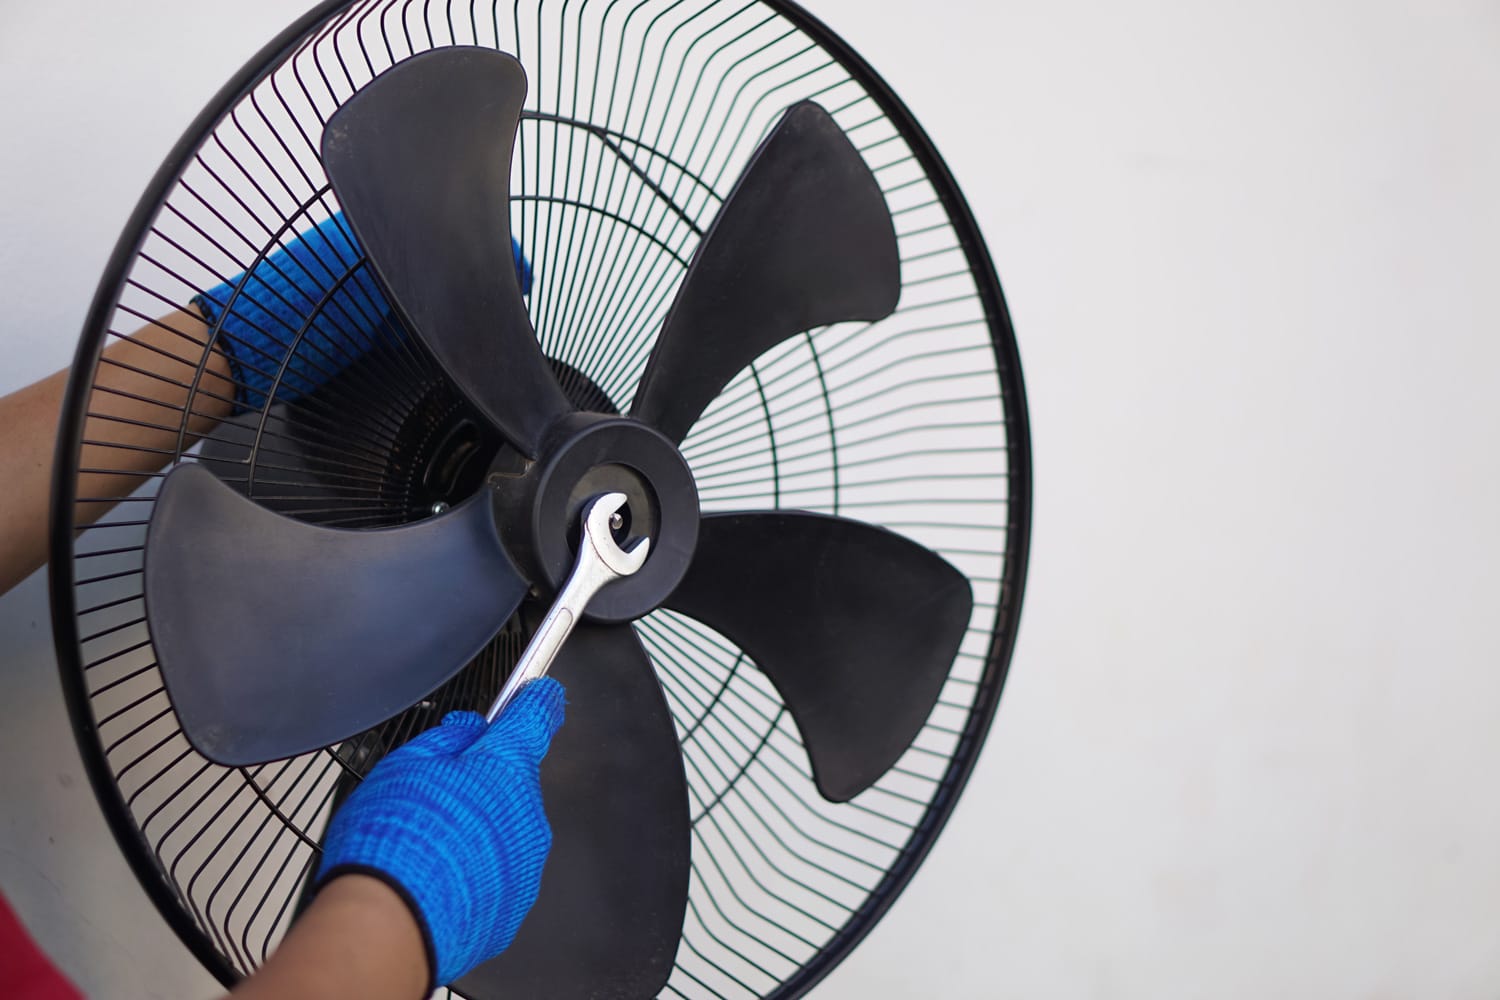
Removing The Fan Blade Lock
The fan blade lock, fan blade cap, or spinner is a large plastic nut that serves two purposes. First, it keeps the fan blade in place, preventing it from spinning out of the fan. Second, it covers the metal rod that spins the fan blade.
To remove the fan blade lock, you need to check the directional arrow. There is a directional arrow that is engraved on the fan blade lock that tells you which direction you should rotate the fan blade lock to loosen it. Keep in mind that in most cases, the fan blade lock will not loosen when you turn it counterclockwise.
Rotate the fan blade lock towards the indicated direction and set it aside after you remove it.
Removing The Fan Blade
The fan blade is attached to the rotating rod that is connected directly to the fan motor. It can sometimes be stuck and hard to remove even after you remove the fan blade lock.
Position your thumb at the tip of the rotating rod. Position the rest of your fingers behind the fan blade. Press your thumb downward while you apply an upward force on the back of the fan blade with your other fingers.
Set the fan blade aside after you remove it.
Removing The Rear Grill Lock And The Rear Grill

The rear grill lock or the guard nut is another plastic nut that keeps the rear grill in place. Just like the fan blade lock, it has an engraved direction that tells you which direction to rotate it to loosen it.
Carefully rotate the rear grill lock in the indicated direction until you have completely removed it. You might have to support the rear grill while you remove the lock. The rear grill will fall right off after you remove the lock in most cases.
Set aside both the lock and rear grill after you remove them.
How to take apart a Lasko cyclone fan?
A Lasko cyclone fan is an all-purpose floor fan that can be used to improve the circulation of conditioned air. However, just like the stand fan, it can quickly get dirty and must be regularly cleaned.
Here are the steps to take apart your Lasko cyclone fan:
- Turn off your Lasko cyclone fan and unplug it.
- Unlike the stand fan, the cyclone fan’s front grill is kept in place by screws in the back instead of a clip. Unscrew the front grill and set it aside.
- The fan blade lifts easily once the front grill is removed. There is no longer a fan blade lock to remove. Just remove the fan blade and set it aside.
- Removing the fan blade exposes the motor. However, unlike the stand fan, the rear grill is also the structural support of the fan that holds the motor in place. To remove the rear grill, you will need to remove the motor first. Unscrew the plastic shroud that covers the motor and set it aside.
- Unscrew the motor from the rear grille. Be careful not to pull on the wires too hard, or you might disconnect something.
How to put back a Lasko fan?
Here are the steps to put together your Lasko fan. Follow the steps that match the model that you have. The steps to put together a Lasko stand fan also applies to the Lasko pedestal fan.
Putting Back A Lasko Stand Fan
- Position the rear grill. The rear grill has a triangular notch. When positioning the rear grill, this triangular notch should be pointing upward. Some models do not have this triangular notch and instead have two rectangular notches. Align the notches on the rear grill to where you can insert them at the top of the fan.
- Carefully screw the rear grill lock. Since you are reassembling the fan this time, you need to rotate it in the opposite direction. Follow the engraving that will point you to where you should rotate it to tighten it.
- Insert the fan blade into the rotating rod. Align the groves at the back of the fan blades to the cylindrical rods.
- Reinstall the fan blade lock. Rotate it in the direction that is indicated to tighten it. Take care that you do not over-tighten the fan blade lock or the rear grill lock. If you screw them too tightly, you might damage or strip the threads, and they will no longer be able to keep the fan blade or the rear grill in place.
- Snap the front grill back into place.
Putting Back A Lasko Cyclone Fan
- Screw the rear grill back to the motor assembly. Make sure that you are using the right screw. There are two different screws on the motor, and using the wrong one would give you a loose connection, or it could strip the thread on the motor.
- Reinstall the motor shroud and screw it into place.
- Reinsert the fan blade.
- Screw the front grill back into place.
How to clean a Lasko tower fan?
Unlike the Lasko fan models that we have discussed so far, the Lasko tower fan cannot be taken apart to be cleaned. However, just like the other Lasko fan models, regular cleaning of the tower fan is a good idea to ensure that it performs efficiently.
The Lasko tower fan has a built-in ionizer in addition to the regular cooling function.
Keep in mind that the Lasko tower fan is not made to be opened. Opening the tower fan can lead to safety concerns. Moreover, opening it will void the warranty.
Here are the steps that you can follow to clean your Lasko tower fan. Lasko recommends cleaning the tower fan at least twice a month.
- Attach the brush attachment to your vacuum cleaner.
- Use the brush attachment to brush the front grill (Lasko recommends starting cleaning from the front grill) while running your vacuum cleaner. Gently brush until you have taken out all the dirt and dust from the front grill.
- Brush the rear grill in the same way.
- If there is stubborn dust or dirt that the vacuum cannot remove, use a canned air duster to loosen the dirt and dust, then vacuum the area once more.
- Once you’re done, wipe the outer shell of the tower fan with a dry clean cloth.
The Dust Off compressed gas disposable cleaning duster from Falcon is available on Amazon. Check it out through this link.
Conclusion
There are different ways to take apart a Lasko fan for cleaning, depending on the model. However, do not take the Lasko tower fan apart because this will void the warranty.
If you enjoyed reading this article, you might find the articles below equally enjoyable to read: