
Whether you're on a house renovation or for your new build house, your chimney installation should be underway. However, you often ask yourself how to install a chimney cap without a flue. Well, rest assured! We've done thorough research on this post and have found the answer below to assist you.
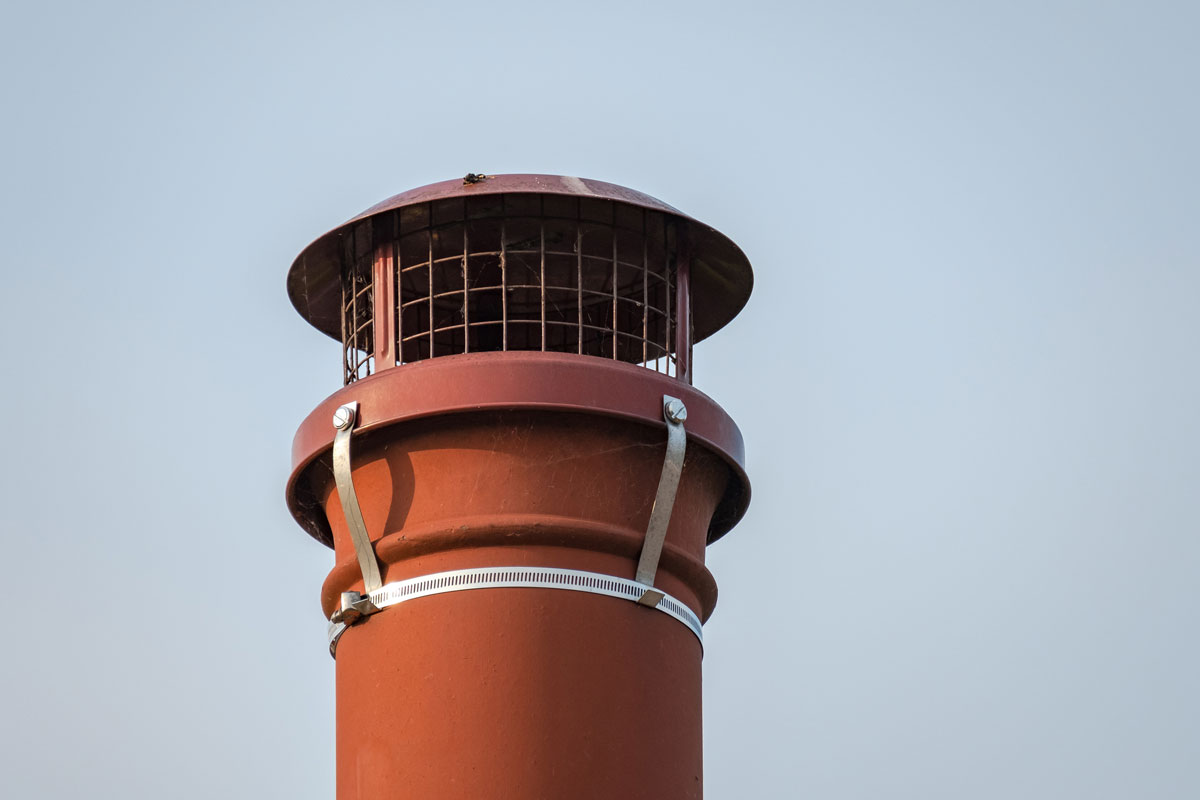
You can generally install the chimney's cap without a flue directly to the crown. Attach the cap using the masonry screws or self-tapping screws, depending on what is applicable in your crown setting.
You'll ensure to securely cover the crown's intake by overlapping the cap 2 inches from the crown's edges. However, installing your chimney cap without a flue liner will increase the fire risk to your chimney!
That sound easy enough! This post will share more information about installing a chimney cap. We'll also cover what makes the chimney flue significant. With that said, let's dive right in!
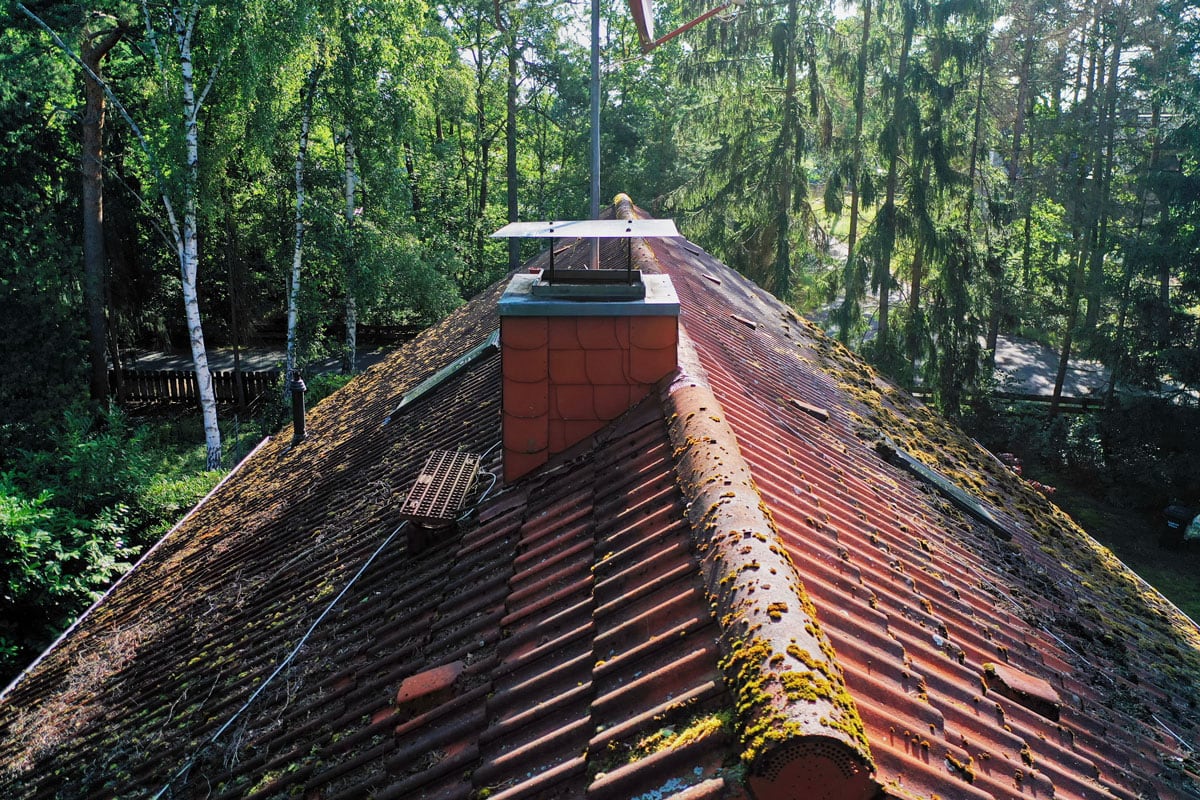
How To Install A Chimney Cap In A Single Flue Chimney
Working on your roof while installing a chimney cap might be unsafe. Consider the following safety precautions when performing roof-related work:
- Avoid using an A-frame type of ladder.
- Safeguard yourself with a safety belt or harness.
- Stretch the top rungs of your extension ladder by 3 feet above the gutters.
- This installation process works best when you have a partner assisting you.
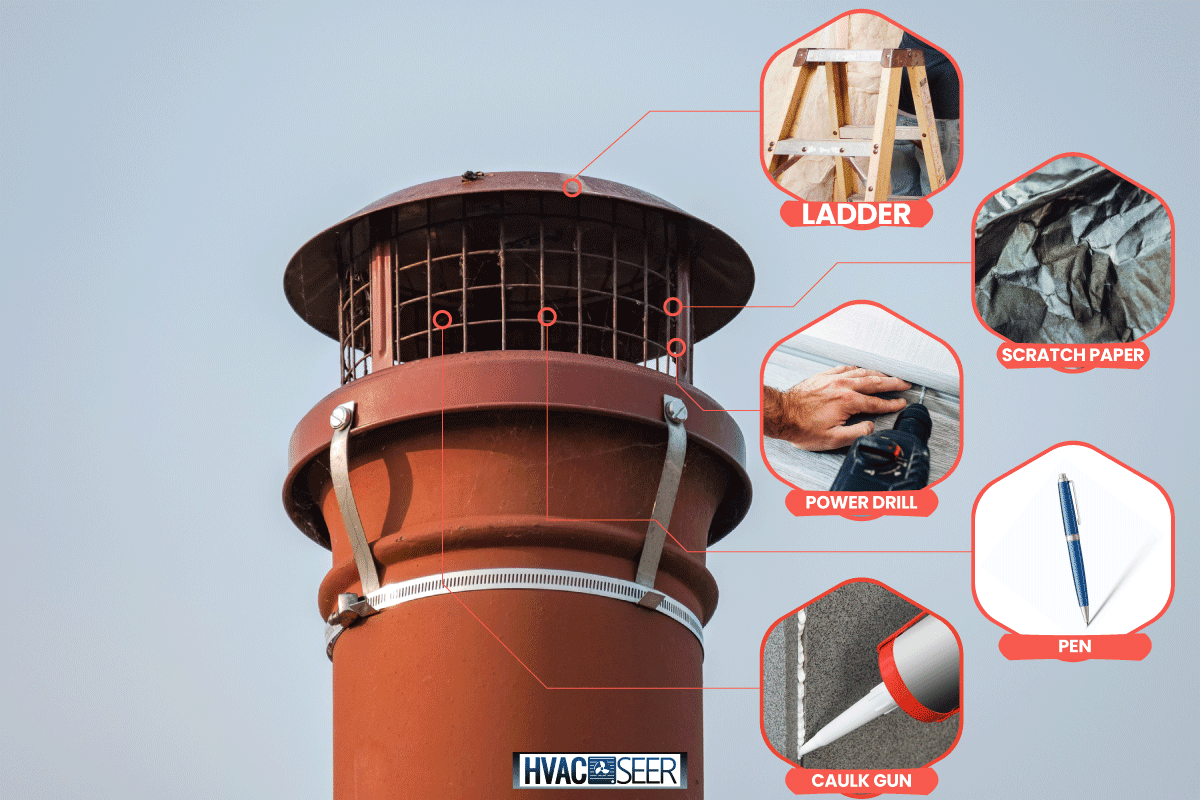
Prepare these essential items before you begin installing your chimney cap.
- Steel tape
- Pen or pencil
- Scratch paper
- Power drill
- Hammer drill
- Impact driver
- Caulking gun
- Ladder stabilizer (optional)
Once you've gathered these things, you can start:
- Carefully position your ladder and climb up your roof.
- Using your steel tape, measure your flue's length, width, and diameter.
- Take a note with your scratch paper of the flue measurements.
- Buy a 1/2 - 1 inch cap size according to your flues measurements.
- Once you've your cap, securely slide and press it down in the flue.
- Use your power drill with a self-tapping screw to securely screw your cap into the metal flue.
- If you have a clay flue, use masonry screws and attach a bit to your hammer drill.
- Drill holes in your cap throughout the flue and drive the screws using your impact driver.
- With your caulking gun, securely seal the cap's base with a fire-resistant sealant.
WARNING! You need to be more gentle when drilling clay flues as this flue is so fragile and might get damaged. In addition, remember to comply with your local building code for chimney cap and flue installation requirements.
See this visual demonstration on how to install your chimney caps from YouTube:
What Is A Chimney Cap?
A chimney cap serves as a cover or protection for your chimney's top. They come in various designs to fit your home's exterior.
Usually, it uses a steel or copper mesh to make these caps. In addition, this is a cap that helps shield your chimney against the weather, especially rain and snow.
Is It Necessary To Install A Flue liner In A Chimney?
A chimney liner or flue liner is necessary when installing a chimney. This is an essential component of your home's safety measures. A building code regulates a proper chimney liner or flue installation within your home.
According to this Ohio building code, you must comply with the ASTM C 325 or equal requirements when using a clay type of lining.
Furthermore, you must use the other accepted materials that resist thermal heat levels around 1,800°F or 982°C.
3 Types Of Chimney Liners
- Clay chimney liners.
- Metal chimney liners.
- Cast-in-place chimney liners.
The Benefits Of Installing A Flue Liner
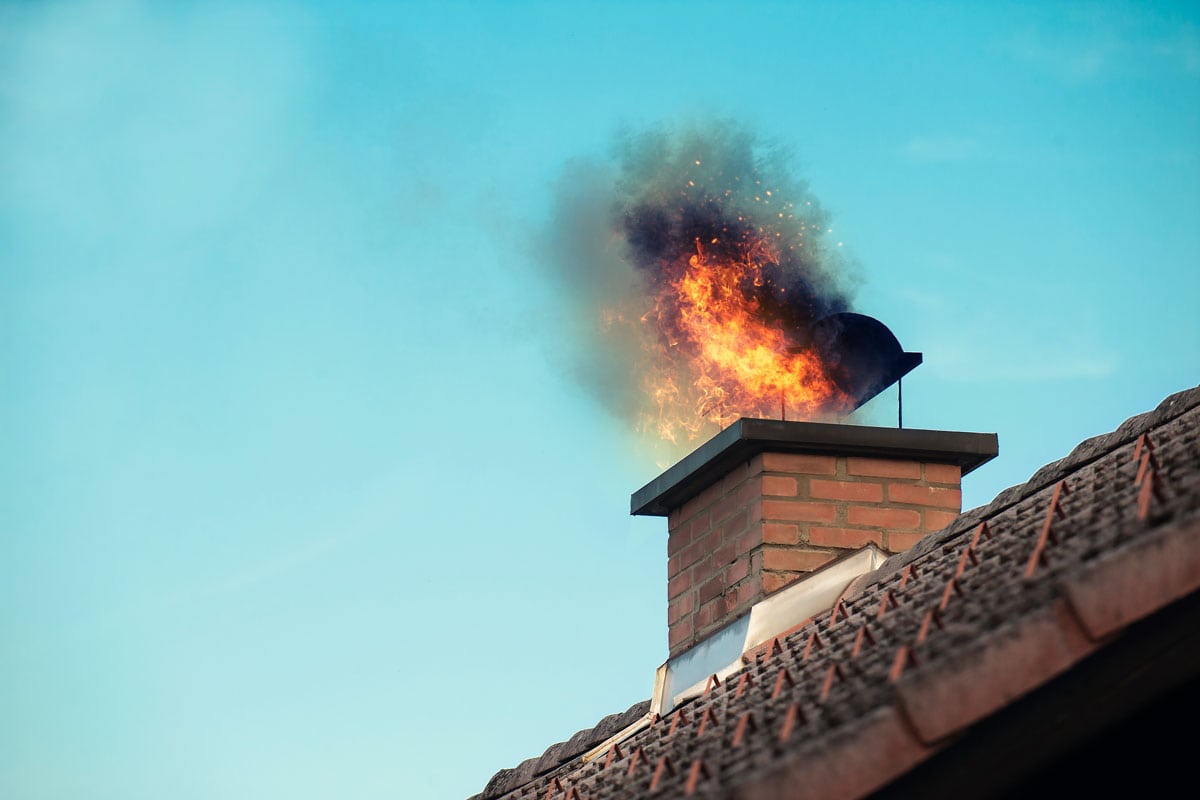
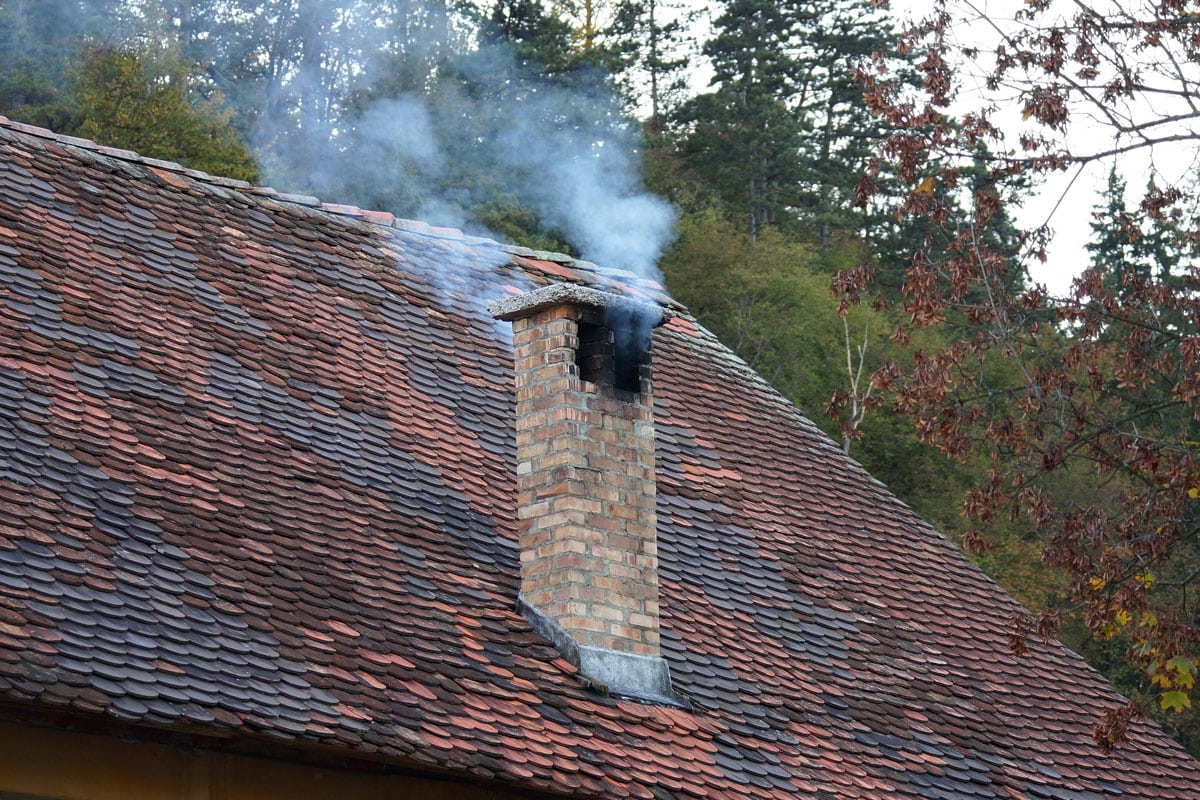
Having a flue lining offers numerous safety advantages for older buildings. The smoke emitting in an open fire, fuel stove, charcoal, and wood fireplaces must exit down the flue as quickly as possible.
There are several benefits of installing a flue liner, and it includes as following:
Prevents Overheating
A chimney liner shields the brickwork and joints of your chimney from the fire's intense heat. Additionally, it covers the chimney from any corrosion brought on by the fire's corrosive flue gas emissions.
Reduce Fire Ignition
Your home's wooden and flammable structures can catch fire if they become overheated. Therefore, a chimney liner is essential in preventing chimney fires that develop due to chimney overheating.
Enhance Energy Efficiency
Liners create an insulation layer within a chimney that lessens the downdrafts that may occur when there isn't a fire in the chimney hearth.
As a result, your home will receive less cold air, requiring you to use your heater less frequently. Moreover, you can conserve a lot of energy because there is a decreased requirement to add gasoline.
Keep Animals Out
Some local wildlife can be adorable, but it won't be much fun if you discover a baby raccoon or a swift bird wandering in your chimney.
Easy To Maintain
In comparison to a chimney made of brick and mortar without a liner, a chimney having flue liners is much simpler to clean and maintain.
Rigid Materials
stainless steel chimney flue liners constructed of steel. Which is far more rigid and resistant to issues like cracks and heat damage when compared to clay and concrete chimney flue liners.
Prevents Toxic Gases
A fireplace's incomplete combustion might generate a toxic gas like carbon monoxide. You must ensure that your home has a safe and proper passageway from any such dangerous gases.
According to the residential code, it's said that you'll need a passageway minimum of 6 square inches and a maximum of 55 square inches.
In addition, these gases have a significant chance of seeping back into your indoors without installing a chimney liner.
Reduces Creosote And Soot Buildup
It can lessen creosote accumulation and soot inside the chimney by a chimney liner. Furthermore, these materials are highly combustible and difficult to clean.
Thus, chimney liners improve safety and make chimney maintenance easier to perform.
Various Types Of Chimney Caps
It's crucial to understand which kind of cap would suit your chimney as chimney caps come in a variety of designs and are composed mainly of metal.
- Integral damper
- Custom chimney caps
- Standard chimney cap
- A top mount chimney cap
- Band-around chimney cap
- An electric draft chimney cap
- A draft increasing chimney cap
- Weathershield chimney caps
How Long Does A Chimney Liner Last?
Using a rigid type of materials in your chimney will determine its lifespan. Generally, you can expect your stainless steel chimney to last around 15 - 20 years.
In contrast, a clay tile type of liner has a lifespan between 5 - 15 years. At the same time, cast or poured-in-place liners have the highest average lifespan of around 50+ years.
How Much Does It Cost To Install A Chimney Cap?
An average chimney cap installation cost is $300, with the highest prices ranging from $75 to $1,000.
Depending on the material and size of the chimney cap but usually, the costs will range from $35 to $550. Sometimes, the installation will cost you between $100 and $200.

See this chimney cap on Amazon here.
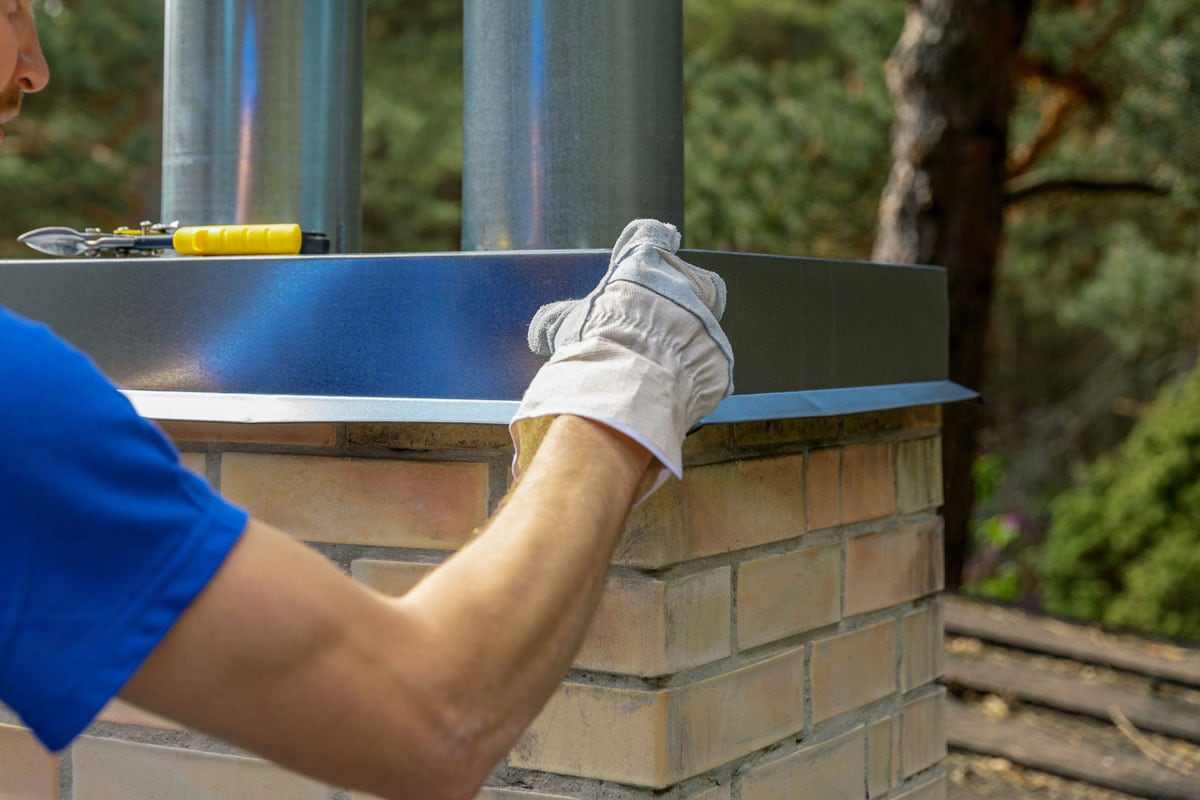
How To Replace A Concrete Chimney Cap
Generally, severe weather changes are the leading cause of the chimney cap breaking or expanding. In time your chimney cap will surely crack or collapse due to the seasonal climate expansion and contraction process.
To properly replace your concrete chimney cap, you'll have to:
- Precisely measure the chimney's both exterior and inside size of its flue.
- Gently shatter your existing chimney cap into smaller chunks to avoid damaging your roof.
- Thoroughly apply a sealant on both the inside and outside lip of the top of the chimney.
- Slowly position your new concrete cap and ensure it overlaps the edge of the chimney by 2 inches.
- Apply a sealant again to all gaps around inner/outside joints between the top and bottom of the cap.
NOTE: These procedures need chimney construction compliance according to your building code regulation.
In Conclusion
You have all the information you may want from us. Installing the chimney cap shouldn't be too difficult with a bit of diligence on researching.
Throughout this post, we've covered how to install the chimney cap without a flue. You also learned that a flue liner is vital in protecting your chimney from overheating.
What's more, you also know the benefits of installing a flue liner.
Before you go, kindly read our other related posts below!